

Let’s face it: dealing with an old, worn-out porcelain tile floor or a dated backsplash is rarely anyone’s idea of a good time.
The cost and sheer effort involved in a full “rip and replace” demolition can stop a renovation project dead in its tracks.
But what if there was a shortcut?
A way to breathe new life into that surface without the demo dust, the heavy lifting, or the immediate hit to your wallet?
The answer, surprisingly, might be hiding in a can of paint.
This guide is designed for homeowners who want professional results without calling in the cavalry.
We’re going to dive deep into the chemistry of bonding, the crucial steps of surface prep, and, most importantly, the three elite paint types that can handle the unique challenges of coating a substrate that’s inherently designed not to stick to anything else easily.
I’ll skip the generic advice and get straight to the technical details you need to ensure your finish lasts. Get ready to transform your space with science and a little elbow grease.
Can You Paint Over Porcelain Tile Adhesive?
Yes, you can paint over that dried, cured porcelain tile adhesive—provided it’s sound and stable.
This isn’t just a quick fix; when executed correctly with the right products and technical preparation, it’s a legitimate, durable refinishing solution for the savvy DIY-er or budget-conscious homeowner.
Painting over porcelain tile adhesive isn’t about covering up a mistake; it’s about leveraging a sound base layer to create a new aesthetic.
The adhesive—assuming the tiles were removed properly and the substrate (usually cement backer board or concrete) is intact—provides an excellent, albeit rough, canvas.
The real challenge here lies in material science. Porcelain tile adhesive (also commonly referred to as thin-set mortar) is typically a Portland cement-based product modified with polymers.
It’s tough, rigid, and highly alkaline when cured. The surface is often porous yet extremely hard. Standard latex wall paint will simply fail to bond long-term, peeling and flaking within weeks of foot traffic or moisture exposure.
The key technical hurdle is achieving adhesion. We need to move beyond mechanical adhesion (sticking into tiny scratches) and aim for a strong chemical bond or, at the very least, robust cross-linking provided by specialized primers and coatings.
The Condition of the Substrate is Everything
Before you even think about primer, you need to inspect your canvas:
Is it clean? Thin-set is a magnet for residual grout haze, soap scum, grease, and general renovation dust. These contaminants are paint killers. The surface must be surgically clean before priming.
Is it structurally sound? The adhesive layer must be firmly attached to the underlying floor or wall. If you tap it with a hammer handle and hear hollow sounds, you have a structural problem that paint cannot solve.
You need to chip out the loose section and patch it with new thin-set or a floor patch compound.
Is it smooth enough? You likely have ridges from the trowel marks left by the original installer.
While a slightly textured finish can hide minor imperfections, major ridges will show through your paint and create tripping hazards on a floor.
Plan to use an angle grinder with a diamond cup wheel or a floor buffer with a sanding screen to knock down the high spots.
Safety note: This creates a lot of silica dust. Use a HEPA vacuum and a proper respirator (N95 or better) during this step.
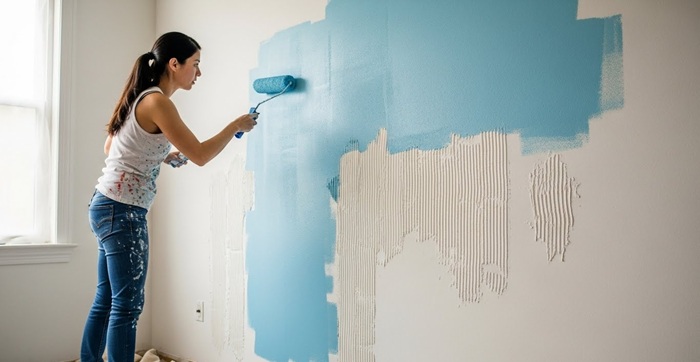
Best Paints to Use Over Porcelain Tile Adhesive
When painting over tile adhesive, we need high-performance architectural coatings that aren’t just colorful but scientifically formulated for maximum durability and adhesion to challenging, cementitious surfaces.
Here are the top three categories of paints that perform exceptionally well in this specific application, moving from good to best:
1. High-Quality Urethane-Modified Acrylic Floor Enamels
These are your robust, single-component options. They are easier to work with than the heavy-hitters below but offer significantly better durability than standard wall paint.
The urethane additive provides flexibility and improved abrasion resistance.
Pros: Water-based versions are low VOC, easy to clean up with soap and water, and come in a wide variety of pre-mixed and tintable colors. They dry relatively quickly.
Cons: Not as chemical- or water-resistant as epoxy. Best for light-to-medium traffic areas like a guest bathroom backsplash or a laundry room floor that doesn’t see daily use.
Technical Tip: For maximum adhesion, ensure you are using a dedicated bonding primer first. The primer is doing 90% of the work here.
2. Two-Part (2K) Water-Based Epoxy Coatings
This is the sweet spot for most DIY tile adhesive painting projects.
A two-part system means a Part A (resin) and Part B (hardener/catalyst) are mixed right before application. This initiates a chemical cross-linking process that creates an incredibly tough, rigid, and impermeable film.
Pros: Exceptional adhesion, highly resistant to water, grease, mild acids, and general household chemicals. Ideal for kitchens, primary bathrooms, and garage floors. The finish is professional-grade and built to last years.
Cons: Limited working “pot life” once mixed (usually 2-4 hours). Requires immediate cleanup with strong solvents if you use an oil-based variant, though water-based epoxies are easier to manage. Requires precise mixing ratios.
Technical Tip: Epoxies yellow over time when exposed to UV light (sunlight). If your area gets direct sun, you may want to top-coat the epoxy with a clear urethane for UV protection.
3. Specialty Urethane or Polyaspartic Coatings (The Pro Choice)
If you want a “never-fail,” virtually indestructible finish, you move into professional-grade floor coatings used by industrial contractors. These are often used as the top clear coat over epoxy garage floors.
Pros: Dries extremely hard and fast. Superior abrasion resistance and clarity. It can often be walked on within a few hours, not days.
Cons: High VOC content in most formulations means strong fumes and requires excellent ventilation/respirator use. They are expensive and require a professional touch to apply quickly before they “flash” (harden too fast).
Technical Tip: Polyaspartic coatings are a modern marvel, curing in freezing temperatures and high heat, offering maximum flexibility for application conditions.
To help you decide which paint is right for your project, here is a breakdown of the properties:
| Coating Type | Skill Level Needed | Where It Works Best | Durability |
|---|---|---|---|
| Acrylic Floor Enamel | Beginner | Laundry rooms, low-traffic areas | Good |
| 2K Water-Based Epoxy | Intermediate | Kitchens, bathrooms, basements | Excellent |
| Polyaspartic / Urethane | Professional | Garages, entryways, heavy-use areas | Superior |
Step-by-Step Guide to Painting Over Porcelain Tile Adhesive
Painting over porcelain tile adhesive is one of those projects where preparation matters more than anything else.
If you rush or skip steps, the paint will almost certainly fail later.
Take your time, follow each stage carefully, and you’ll get a finish that actually lasts.
1- Start with a deep, thorough clean
Before anything else, the surface needs to be absolutely clean—think “surgically sterile.”
Begin by sweeping and vacuuming to remove loose dust and debris.
Next, tackle grease and residues using a strong degreaser like TSP, mixed as directed. Scrub the surface well, then mop and rinse repeatedly with clean water until there’s no residue left.
For floors, lightly etching the cementitious surface is highly recommended because it opens up the pores and helps the primer bond better.
Once done, rinse and neutralize the area properly, then let everything dry for at least 24 to 48 hours. The surface must be completely dry before moving forward.
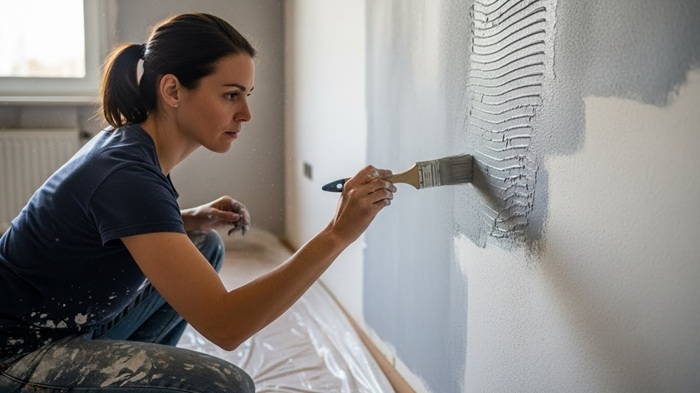
2- Create texture so the paint can grip
Once the surface is clean and dry, it’s time to give the primer something to hold onto.
Smooth out any high or uneven spots using a grinder for floors or a sander for walls. Then lightly sand the entire area with coarse sandpaper to remove any sheen and create fine scratches.
You’re not trying to remove the adhesive—just rough it up enough for better adhesion.
Finish by vacuuming thoroughly and wiping the surface with a lint-free cloth and a small amount of alcohol or acetone to remove the last traces of dust.
3- Apply the right primer—and don’t rush it
This step is crucial. Regular wall primer won’t work here. You need a high-adhesion bonding primer specifically designed for slick or non-porous surfaces. Apply a thin, even coat using a roller, and use a brush for edges and corners.
Once applied, let it cure fully as per the manufacturer’s instructions. This waiting time is non-negotiable—rushing the primer is one of the most common reasons paint fails later.
4- Paint in thin, controlled layers
When it’s finally time to paint, carefully follow the instructions for your chosen coating, whether it’s epoxy, enamel, or urethane.
If you’re using a two-part epoxy, measure and mix precisely, and allow the recommended induction time before applying. Use good-quality rollers and brushes, and apply thin, even coats.
Two light coats will always perform better than one thick one. Pay close attention to recoat times—painting too early or too late can cause bonding issues and force you to sand all over again.
5- Let it cure fully—patience pays off
The final step is simply waiting, and for many DIYers, this is the hardest part.
While light foot traffic is usually fine after about 24 hours, the coating won’t reach full strength for several days. Epoxy finishes, in particular, can take up to a week to fully cure.
During this time, avoid heavy furniture, dragging appliances, or exposing the surface to excess water. Giving the paint proper curing time is what turns a good-looking finish into a durable one.

Considerations when Applying Paint Over Dried Porcelain Tile Adhesive
Painting over existing substrates is a great alternative to demolition, but it comes with caveats that seasoned pros understand.
Longevity vs. Replacement
Be realistic. A brand-new, professionally installed porcelain tile floor has a lifespan measured in decades.
A painted floor, even with the best epoxy, has a lifespan measured in years (typically 3–7 years in high-traffic areas before needing touch-ups or a top coat). This is a refinishing hack, not an immortal solution. Manage your expectations.
Texture and Slip Resistance
Porcelain tiles and the bare adhesive underneath can be incredibly slippery when wet. If you are painting a floor, especially a bathroom or kitchen, you must add a slip-resistant additive to your final clear coat or top paint layer.
These fine, clear grits are mixed in just before application and provide necessary traction without compromising the look of the finish.
The “DIY Warranty”
When you take on a project like this, you are the project manager, the laborer, and the quality control inspector.
If the paint fails six months down the line, it’s rarely the paint’s fault; it’s usually due to improper prep (contaminants or moisture were present) or a failure to follow the curing instructions.
Ventilation and Safety Gear
We touched on this earlier, but it warrants its own serious mention. Epoxy and urethane coatings contain strong chemicals and high VOCs.
- Always wear a properly fitted respirator with organic vapor cartridges (not just a dust mask).
- Ensure excellent cross-ventilation in your work area using fans.
- Wear chemical-resistant gloves and safety glasses. Read the Safety Data Sheet (SDS) for your specific product before opening the can.
The Bottom Line
Painting over porcelain tile adhesive can deliver impressive results, but only when the right paint system is chosen and applied correctly.
High-adhesion options like acrylic floor enamel, water-based epoxy, and professional-grade urethane coatings offer varying levels of durability, making it easier to match the paint to your space and usage needs.
For low-traffic areas, DIY-friendly coatings work well, while kitchens, bathrooms, and floors benefit from tougher systems built to handle moisture and wear.
With patience and the right approach, painting over porcelain tile adhesive isn’t just possible—it can be a cost-effective way to refresh surfaces without full removal or replacement.
Share the post "3 Best Paints that Work Over Porcelain Tile Adhesive"

One of the greatest feelings in the world is finishing a project. Whether it be remodeling part of your house Read more

Old & Empty Paint Cans We see continuous development around the globe all the time. Due to this, you can Read more

Repainting your cabinets is a great way to give your kitchen a fresh, newer look. However, there is a deceptive Read more

Painting your home can be a great relaxation and fun for DIYers. Yes, it's wonderful - until you spill some Read more

Jack Luis is a semi-retired painter who loved painting his clients’ ideas on their walls.
He had worked as a painter for over a decade serving customers in areas such as Charleston, Mount Pleasant, Beaufort, and Georgetown, SC (South Carolina). Today in his free time, he likes to read and write about the newer techniques implemented in his profession. You may read more about him here or get in touch with him here.