

A clay chiminea is one of those charming backyard companions that does more than warm your evenings—it adds character, ambiance, and a touch of rustic artistry to your outdoor space.
But like any hardworking friend exposed to fire, smoke, rain, and sun, it deserves a little TLC. And that’s where choosing the right paint becomes surprisingly important.
However, the fact is that not all paints can handle the heat (literally), and using the wrong one can turn your beautiful chiminea into a cracked, flaky mess faster than you can say “bonfire night.”
Whether you’re restoring an old, weathered piece or giving your new chiminea a personalized flair, understanding what kind of paint works—and how to apply it properly—will save you time, money, and headaches.
Let’s break it down so your chiminea stays stunning, safe, and ready for many cozy nights ahead.
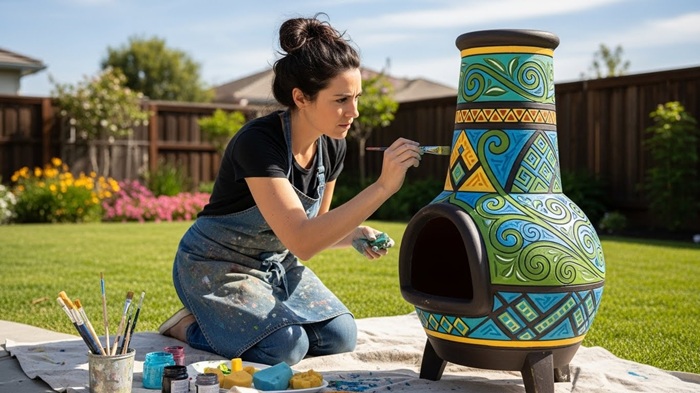
Best Paints to Use for a Clay Chiminea
Once time takes its toll on your chiminea and it has worn down, restoring it by using the right paint can be your ideal option.
For decorating the exteriors of clay chimineas, you can use a high-quality exterior masonry paint because it’s breathable (important for clay), weather-resistant, durable, and available in dozens of colors.
Acrylic and household emulsion paint can also be used over clay chimineas. But make sure all of these are sealed afterwards for durability.
Masonry and acrylic paint can cover clay chimenea surfaces very well while resisting the effects of heat. Moreover, when needed, you can easily clean and repaint the surface of your clay chiminea in the future so that it will last for many more years of use.
But be aware that if you need to paint the inside of your clay or terracotta chiminea for any reason, heat-resistant paints specifically designed for outdoor use are ideal.
Heat-resistant silicone enamel is one of the best high temperature chiminea paints, which acts as a protective & decorative coating designed for temperatures up to 600°c.
How to Paint a Clay Chiminea Like a Pro?
Painting a clay chiminea is less about “just making it pretty” and more about giving it a protective coat of armor against weather, soot, and hairline cracks.
And yes—masonry paint is a fantastic choice for the outside because it bonds beautifully with porous clay.
Just remember: never paint the inside of a clay chiminea. It needs to breathe and handle direct heat naturally.
Here’s how to do it the right way.
Step 1 – Wash & Clean
Start by laying down drop cloths—your patio pavers will thank you later.
Clay chimineas collect soot, dust, pollen, and sometimes even bits of old ash. Give the exterior a thorough cleaning using mild detergent, water, and a soft sponge or brush.
If there are stubborn patches, scrub gently with a stiff brush, but avoid overly aggressive cleaning—clay is tough but not invincible.
Tip: Let it dry completely before moving to the next step. Painting damp clay is a disaster waiting to happen.
Step 2 – Light Sanding
Grab 80–120 grit sandpaper and lightly sand the exterior only. This helps the masonry paint grip the surface and smoothens imperfections or crusty deposits.
You’re not trying to reshape the chiminea—just giving it a little exfoliation.
Wipe off the dust afterward with a dry cloth.

Step 3 – Apply a Clay-Safe Primer
Clay is porous and loves to suck in paint unevenly. A masonry or exterior-grade primer solves that by sealing the surface.
You can use:
- Brush-on masonry primer, or
- Spray-on masonry primer (faster and cleaner)
Do not use automotive or metal heat-resistant primers—they don’t bond well with clay.
One even coat is enough. Let it dry fully.
Step 4 – Paint with Masonry Paint
Now for the fun part. Pick your high-quality exterior masonry paint and apply 1–2 thin, even coats. Never use thick layers, as they may crack over time.
Allow proper drying between coats as per the manufacturer’s instructions.
Again, remember that you only paint the outside. The interior must stay unpainted so it can handle direct fire safely.
Step 5 – Seal with a Clear, Heat-Tolerant Sealer
Masonry paint protects your chiminea from the weather, but the real hero is the clear clay sealer you apply afterward.
Choose an acrylic masonry sealer or an outdoor clay pottery sealer. It should be water-repellent and heat-tolerant (not necessarily heat-proof, since it’s only on the exterior).
A good sealer not only prevents moisture absorption and reduces the risk of cracking but also makes cleaning soot easier and helps your paint job last longer.
Just remember to reapply the sealer on your clay chiminea every 4–6 weeks during heavy usage months.
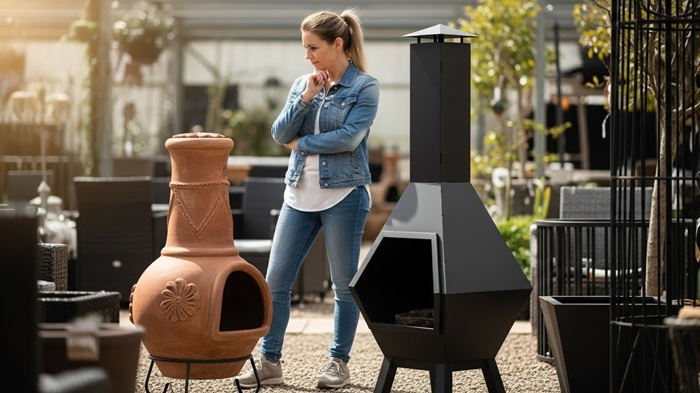
Clay or Metal Chiminea: What’s Better?
If you ask anyone on the street which chiminea lasts longer, most people—without a second thought—will point at the heavy, rugged steel or cast-iron chiminea.
And honestly, they’re not wrong.
A well-finished metal chiminea is like the dependable old friend who can handle scorching heat, sudden rain, winter frost, and even the occasional forgotten cover. With proper maintenance, they age beautifully and outlast most backyard décor trends.
But durability isn’t everything.
If your heart leans toward that classic, earthy, rustic charm, a clay chiminea—whether an air-dried clay chiminea or a sturdier kiln-dried clay chiminea—offers a warmth (visually and literally) that metal simply can’t replicate.
There’s something timeless about the gentle curves, natural tones, and handcrafted feel of clay or terracotta.
Clay chimineas still hold their own, especially when you consider their unique advantages:
1- Lightweight & Budget-Friendly: A clay chiminea is generally lighter on your patio—and on your wallet. Ideal if you like rearranging your outdoor space every season (or every Sunday).
2- Easy to Move Around: Want it near the seating area today and closer to the garden tomorrow? No problem. Even larger models can be repositioned without a weightlifting session.
3- Some Versions Support Grilling: Certain larger clay chimineas can accommodate small food grills for casual cooking, adding multi-functionality without complicated hardware.
4- Eco-Friendly by Nature: Clay is a natural material made from earth, water, and heat. Whether it’s air-dried or kiln-fired, it’s as environmentally friendly as materials get.
5- Cooler and Kid-Safer: Compared to cast iron, clay and ceramic cool down significantly faster once the fire dies out—reducing burn risks around curious kids and pets.
Plus, clay chimineas score extra points for sustainability—they’re incredibly easy to refinish, repaint, and reuse.
With a fresh coat of masonry paint or sealer, even an old, weathered chiminea can look surprisingly new again, making clay a wonderfully renewable choice for style-conscious outdoor lovers.
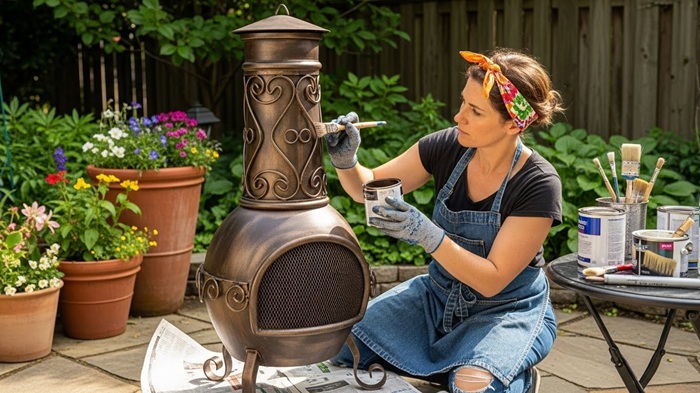
What are the Best Paints for a Metal Chiminea?
When it comes to metal chimineas, these outdoor fire-breathers face constant exposure to high heat, smoke, soot, condensation, and occasional grease splatter, so they need a coating engineered to handle abuse. That’s where heat-resistant paints come in.
Most of the types of high-heat-resistant paint are available in classic finishes such as matte black, satin black, silver, grey, gold, red oxide, and off-white, because outdoor fire equipment prefers durability over designer shades.
Reliable manufacturers include Rust-Oleum, Krylon, Vitcas, Behr, and Dulux, all of which offer specialty high-temperature formulations. If you want something that goes on easily, dries fast, and doesn’t complain when the fire hits full blast, these brands are a safe bet.
For a metal chiminea—especially cast iron or steel—you’ll want an ultra-tough, quick-drying, high-heat enamel such as Rust-Oleum Stove & BBQ Spray Paint.
These colored paints and coatings are designed for stoves, ovens, grills, and fireboxes, so naturally they handle the heat of a chiminea without blistering or peeling.
Another excellent option is Hammerite Paint, specifically engineered for high-temperature metal surfaces.
Hammerite’s formulation is known for its ability to resist flaking, cracking, corrosion, and rust, making it ideal for restoring or upgrading a weathered cast-iron chiminea.
It adheres strongly to metal, but as an important note, it is not suitable for clay, ceramic, or terracotta chimineas.
If your goal is to boost the longevity and looks of a metal chiminea, a high-heat, metal-specific paint such as Hammerite or Rust-Oleum is one of the simplest and most effective upgrades you can make.

Maintenance Tips for a Clay Chiminea to Keep It In Good Condition
A clay chiminea may look sturdy and ancient—as if it survived a small archaeological dig—but it still needs gentle, regular care to stay in great shape.
A little attention goes a long way in preserving both the paint and the structural integrity of your clay chiminea.
So, here are a few tips for you to keep in mind…
1- Start the season with a clean slate
Before lighting your first fire of the season, give your chiminea a quick spa treatment: wash the exterior with mild dish soap, rinse thoroughly, and let it dry completely.
Moisture trapped in clay is never good news—it expands when heated and can encourage cracks.
2- Clean out ash and sand regularly
Empty the ash and sand bed periodically to maintain proper airflow and prevent soot buildup.
A clean burn chamber also helps the clay surface stay cooler and prolongs paint life. When needed, give the exterior a gentle wipe-down.
3- Protect your clay chiminea from the elements
Clay is porous, so rain, frost, and humidity are not its best friends. When not in use, cover your chiminea with a breathable outdoor cover and bring it indoors or under a roof during harsh weather.
Make sure that you move it carefully. As clay is fragile despite its size, use a helper or a small cart to avoid accidental drops.
4- Practice safe heating and avoid thermal shock (clay’s worst enemy)
Your paint and the clay itself will last longest when the fire stays inside the bowl.
Use shorter firewood—about 1 foot or slightly less—so logs don’t lean out and scorch the exterior. Most hardware stores sell wood in this convenient size.
Clay, especially terracotta, dislikes rapid temperature changes. So remember:
- Never use water to extinguish a fire—the sudden cooling can crack the body.
- Instead, use a poker to turn over the sand and bury the embers for a slow, safe cooldown.
5- Consider repairing and repurposing your old chiminea
If your old clay chiminea develops a crack, all is not lost. You can patch it using a clay-specific liquid crack sealer, and then refinish it with masonry paint after sealing.
If the damage is too extensive to safely use with fire, give your chiminea a second life—turn it into a charming rustic flowerpot or garden accent. Clay is wonderfully reusable, even in retirement.
A few other important safety notes:
- Never stack clay chimineas. Their weight and fragility make this a recipe for heartbreak and broken pottery.
- Clay stays cooler externally than cast iron, making it safer around children or pets.
- Clay doesn’t rust, unlike metal chimineas—another long-term bonus.
- However, clay can crack if handled carelessly, so steady hands and gentle movements are key.
The Bottom Line
Clay chimineas are rustic and natural. These are fabulous when you want to enjoy the weekend with your family in winter.
You can keep them outdoors (in the backyard or patio) during the day and move them indoors for the evening.
The good thing is that they do not require a lot of work when cleaning and refinishing. With some good care, repaint, and regular touch-ups, you can keep your clay chiminea last for years.
Just make sure you use the right paint and follow the steps while maintaining.
Share the post "What Kind of Paint to Use on Your Clay Chiminea – And How?"

With Radon warnings and sealers out there, it can send your head into a spin about whether this is all Read more

We all love MDF for our various projects, including furniture and cabinets. After all, it's cost-effective compared to other wood Read more

For those who want their walls to have a unique appearance, glow-in-the-dark paint is one way to express creativity. As Read more

For over two hundred years, the Valspar brand has been associated with quality. Starting in 1806, the company grew into Read more

Jack Luis is a semi-retired painter who loved painting his clients’ ideas on their walls.
He had worked as a painter for over a decade serving customers in areas such as Charleston, Mount Pleasant, Beaufort, and Georgetown, SC (South Carolina). Today in his free time, he likes to read and write about the newer techniques implemented in his profession. You may read more about him here or get in touch with him here.