
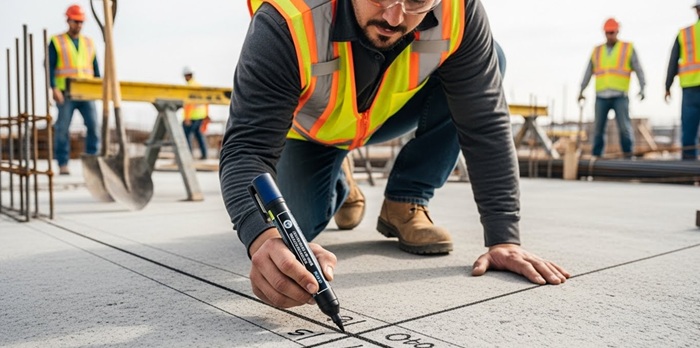
Construction doesn’t forgive guesswork.
Whether you’re framing a house, laying conduit, installing cabinetry, or tackling a serious DIY remodel, every successful project starts with clear, accurate, and durable markings.
A cut line that fades, bleeds, or washes away can cost time, materials, and money—sometimes all three.
Yet many professionals still underestimate how much impact the right marker can have on productivity and precision.
Concrete dust, wet surfaces, heat, UV exposure, metal oils, rough lumber—construction environments are hostile to ordinary pens.
That’s why choosing the best markers for construction projects isn’t about brand loyalty; it’s about performance under pressure.
In this guide, we’ll break down the most reliable marker types used on real job sites, explain when and where each excels, and help you choose marking tools that won’t fail halfway through the job.
Who Uses Construction Markers?
Construction markers are not stationery—they’re job-site instruments.
They must survive abrasion, moisture, temperature swings, and rough handling while still delivering legible, accurate lines.
- Construction workers marking cut lines, anchor points, and layout references.
- Painters outlining boundaries and reference areas.
- Carpenters marking measurements on wood, plywood, and treated lumber.
- Electricians and plumbers labeling pipes, conduits, and junction points.
- Home improvement DIYers who want professional-level results.
In short, accurate marking saves time, reduces rework, and improves safety. On busy sites, that’s non-negotiable.
However, for effective and efficient work, a proper construction marker should write on rough, dusty, oily, or wet surfaces very well. Additionally, it should be visible in low-light or high-glare environments.

5 Types of Markers for Construction Projects
No single marker handles every surface perfectly. Professionals often carry more than one type to cover different materials and conditions.
Below are the five most practical categories.
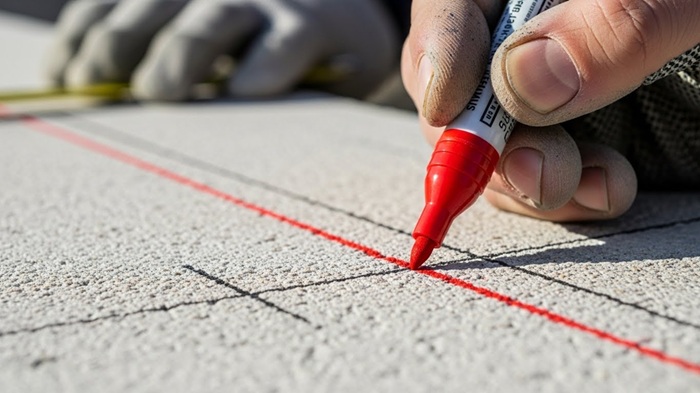
1. Industrial Paint Markers
When durability is critical, industrial paint markers are often the first choice. These markers dispense oil- or xylene-based paint that adheres to porous and non-porous surfaces alike.
They are commonly used for:
- Layout marks on slabs
- Labeling steel beams
- Identifying cut points on masonry
For heavy-duty applications, permanent industrial paint markers excel because the paint cures into a tough, weather-resistant layer.
Many professionals rely on industrial paint markers for concrete and industrial paint markers for metal when permanence matters more than removability.
Pros
- Extremely durable
- Writes on rough, dusty surfaces
- Excellent outdoor longevity
Cons
- Longer drying time
- Harder to remove
2. Permanent Markers
Permanent pen markers are widely used because they’re quick, familiar, and versatile. However, not all permanent markers are job-site worthy.
High-quality permanent markers for concrete use stronger solvents and higher pigment loads, allowing them to grip porous surfaces better than office-grade markers.
They’re also commonly used as markers for wood and markers for plastic during fabrication and installation.
Pros
- Fast-drying
- Affordable
- Easy to carry
Cons
- Less durable than paint markers
- Can fade outdoors
3. Construction Chalk Markers
A construction chalk marker is ideal when markings need to be visible but temporary. Unlike traditional chalk, chalk markers dispense liquid chalk that dries into a bright, matte line.
They’re often used indoors or in controlled environments where visibility matters more than permanence. High-contrast chalk markers are especially useful on dark surfaces where pencil or pen lines disappear.
Pros
- Easy to remove
- Excellent visibility
- Non-damaging to surfaces
Cons
- Not weather-resistant
- Not suitable for long-term markings
4. Marker Pencils and Specialty Pencils
A construction marker pencil isn’t just a carpenter’s pencil—it’s a refined tool designed for accuracy.
Many models include replaceable leads, deep-hole tips, and stronger graphite or wax-based cores.
These are often paired with precision measuring tapes and marking gauges for consistency to ensure repeatable results in finish work and cabinetry.
Pros
- Extremely precise
- No drying time
- Great for fine measurements
Cons
- Not ideal on metal or wet surfaces
- Lower visibility on dark materials
5. Heat-Resistant and Specialty Markers
Some environments demand more than standard durability.
Heat-resistant markers are designed to maintain legibility under extreme temperatures, making them suitable for welding, fabrication, and industrial maintenance.
They’re commonly used in combination with other accurate marking tools when layout accuracy and material identification are critical.
Pros
- Withstands high temperatures
- Specialized performance
Cons
- Higher cost
- Narrow use cases
| Marker Type | Best Surfaces | Typical Use Case |
|---|---|---|
| Industrial Paint Marker | Concrete, metal, masonry | Permanent layout, outdoor work |
| Permanent Marker | Wood, plastic, light concrete | Fast marking, general use |
| Chalk Marker | Painted surfaces, tile | Temporary layout |
| Marker Pencil | Wood, drywall | Precision measurements |
| Heat-Resistant Marker | Metal, fabrication zones | Welding, high-heat areas |
Who makes the best markers for painters, carpenters, and construction workers?
The most popular brands include Sharpie and Milwaukee. They make a variety of different types of markers with varied tips and bodies.
Hiboom, RevMark, Sakura, Artistro, and Dixon are a few others that can be checked and compared when buying from online stores like Amazon and Home Depot.

Choosing the Right Marking Pens for Your Project
Selecting the right marking pen isn’t about grabbing the first marker on the shelf—it’s about choosing a tool that performs consistently from the first line to the final mark.
The right marker saves time, improves accuracy, and prevents costly rework. Here’s how to make a smart, project-ready choice.
1. Define the Job Before You Buy
Start with the purpose. Are you marking layout lines, labeling materials, decorating surfaces, or doing precision touch-ups?
Equally important is the surface:
- Porous: wood, paper, cardboard, concrete
- Non-porous: glass, metal, plastic, ceramic
Markers are engineered differently for each material. Knowing where and how you’ll use the pen instantly narrows your options and avoids compatibility issues like bleeding, skipping, or poor adhesion.
2. Choose the Right Tip Geometry
Marker tips aren’t interchangeable—they’re engineered for specific tasks:
- Fine or extra-fine tips: Precision lines, labeling, technical markings
- Chisel tips: Broad strokes, shading, edge marking
- Brush tips: Lettering, calligraphy, controlled line variation
For construction layouts or industrial marking, rigid fiber tips maintain line width better than soft brush tips.
3. Match the Ink to the Surface
Ink chemistry matters more than most people realize:
- Water-based inks: Best for porous surfaces; low odor and easy cleanup, but limited durability.
- Oil-based inks: Ideal for glass, metal, plastic, and ceramic. These inks resist water, abrasion, and fading.
- Alcohol-based inks: Highly versatile, fast-drying, and suitable for both porous and non-porous surfaces.
If permanence matters—or if the marking must survive handling, washing, or outdoor exposure—oil-based inks are usually the safest bet.
4. Select Colors with Intent
Color choice is functional, not just aesthetic.
- High-contrast colors (black, white, yellow) improve visibility on job sites.
- Metallics and pastels add flexibility for creative or decorative work.
- Small sets (6–12 colors) are perfect for occasional projects.
- Larger sets make sense for professionals or frequent users who need flexibility.
If you’re labeling glass jars, equipment, or storage bins, ensure the set includes opaque colors that remain legible on transparent surfaces.
5. Pay Attention to Drying Time & Durability
Slow-drying ink is a productivity killer—and a smudge magnet.
Look for markers that:
- Dry quickly without thinning or streaking
- Maintain even ink flow
- Produce smudge-resistant, solid lines
Compact or mini markers with fine felt tips are excellent for quick marks and on-the-go use. For surfaces like porcelain or ceramic, confirm the ink won’t wash out after curing.
Rule of thumb: oil-based inks generally dry faster and last longer than water-based ones.
Choosing the right marker ultimately depends on three factors:
- Surface type
- Environment
- Required permanence
Ask yourself:
- Will the surface be wet, dusty, or oily?
- Does the marking need to last hours, days, or years?
- Will it face sun, rain, heat, or abrasion?
For layout-heavy or precision-critical tasks, professionals often pair markers with laser levels, steel stencils, and measuring tools to reduce cumulative errors.
Can You Use a Marker on a Wet or Damp Concrete Wall?
Yes—but with limitations.
Concrete is porous, and moisture prevents inks from bonding properly. Standard markers will fade or bleed.
For damp conditions, especially when marking concrete walls or floors in cold weather, oil-based paint markers perform best.
Tips for success:
- Wipe off surface moisture first
- Use paint markers with thicker pigment
- Allow extra drying time
Avoid water-based markers entirely on wet concrete.
How to Remove Old Markings from a Previously Marked Concrete?
Construction markers use stronger pigments, solvents, and tips designed for rough, dirty surfaces.
Oil-based paint markers provide the best durability outdoors. Chalk markers are designed to be removable and non-damaging.
Whereas many professionals rely on industrial paint markers for metal fabrication and labeling.
However, removing old markings depends on the marker type and surface condition.
Common removal methods:
- Isopropyl alcohol or acetone (for permanent markers)
- Pressure washing (for chalk and light paint)
- Concrete grinding or sanding (for deep paint penetration)
Before you try, it’s good to test removal methods on a small area first to avoid surface damage.
The Bottom Line
Marking may seem like a small step in construction, but it’s the foundation of accuracy. The right marker improves workflow, reduces mistakes, and adds a level of professionalism that separates skilled tradespeople from amateurs.
Whether you’re outlining cuts, labeling materials, or laying out entire sections, investing in the right construction markers pays dividends in efficiency and confidence. Choose wisely—and let your markings work as hard as you do.
Share the post "5 Best Markers for Construction Projects"

From building furniture and refurbishing existing furnishings to touching up the doors, tables, and other wooden pieces in your home, Read more

Getting the best paint job means more than using the right paint. In addition to having good brushes and rollers, Read more

You are in the middle of sanding your walls, and you realize that there are still many more pieces of Read more

I remember the early days when my father, as a painter, did not have many options for spraying the cabinets Read more

Jack Luis is a semi-retired painter who loved painting his clients’ ideas on their walls.
He had worked as a painter for over a decade serving customers in areas such as Charleston, Mount Pleasant, Beaufort, and Georgetown, SC (South Carolina). Today in his free time, he likes to read and write about the newer techniques implemented in his profession. You may read more about him here or get in touch with him here.