
Getting the best paint job means more than using the right paint. In addition to having good brushes and rollers, you will need the correct edger as well to work on areas like trims and ceilings so that you can get close in corners and tight spaces more efficiently.
Techniques like ‘cut-in’ can be time-consuming and require much practice.
But getting the best painting tools for edges can make your life much easier by delivering the most accurate strokes and saving you valuable time on repainting and fixing the mistakes.
5 Best Paint Edgers
No matter whether you work as a DIYer or a professional home painter, a paint edger tool is a must-have to avoid that badly done paint job.
What follows is a list of the top painting tools for edges on the market today. Each of them offers what you need in terms of painting where you need it.
Just consider your personal preference and pick the right one for your project.
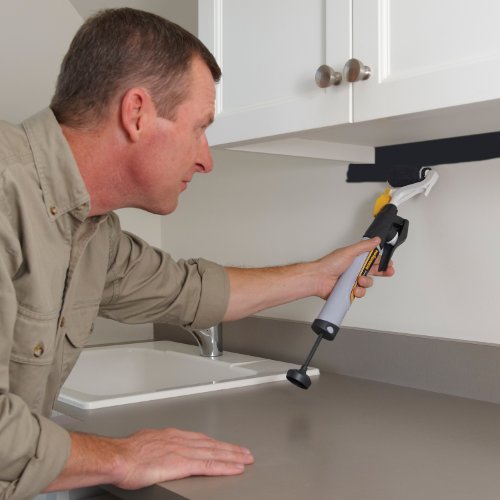
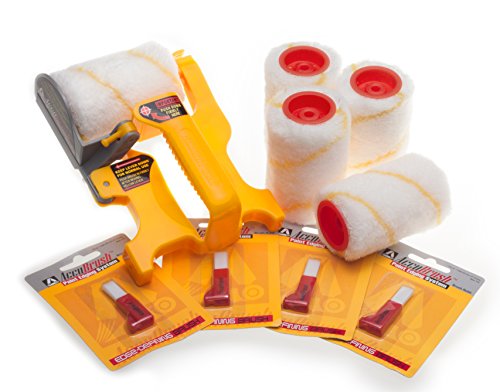
1- Accubrush MX Paint Edger
- Accubrush cuts painting time in half, greatly reducing need for...
- Cuts in paint cleanly around doors, windows, ceilings,...
- Rollers and brushes are washable and reusable.
*Last update on 2026-03-30 / Affiliate links / Images from Amazon Product Advertising API
| What I Like | What I Don’t Like |
|---|---|
| • 11-piece set • Simple to use • Rollers are washable and reusable • Ergonomically designed • 30-day money-back guarantee | • Does not work with textured walls • You will have to do some cleaning afterward |
The Accubrush edger tool is basically an 11-piece fabulous kit that includes four brushes and four rollers in addition to the edger. This means you can start with this kit and get what you need for most paint jobs.
The edger is easy to use as all you need to do is fill the roller with paint and start pressing the roller firmly into the wall, which will give you better control. There is also a comfortable grip that allows you to work for hours without undoing cramping or strain when you use the correct rolling technique.
The Accubrush MX Paint Edger may not be the best on the market, but it is almost impossible to beat for smooth walls.
It’s not the perfect tool, as textured walls are basically not within the realm of what the Accubrush will accomplish. But then again, most rollers are not designed for textured walls either.
A minor point I also like to mention is that you will need to clean the edger and rollers, which can be a bit messy, but otherwise not too bad. All that said, if you are determined to get one of the best paint edger tools, I think this is your choice.
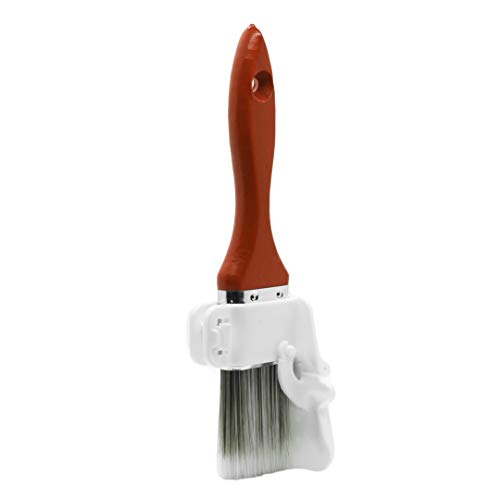
2- Emery Edgers Paint Brush Edger Tool
- WINNER OF THE “RETAILER’S CHOICE AWARD”: At largest home...
- TWO-SHIELD RESERVOIR DESIGN: Our innovative Patented Two-Shield...
- PAINTBRUSH NOT INCLUDED - ATTACHES TO 2 INCH PAINTBRUSHES: Do not use...
*Last update on 2026-03-30 / Affiliate links / Images from Amazon Product Advertising API
| What I Like | What I Don’t Like |
|---|---|
| • Durable • Easy to attach • Works with paints, stains, and lacquers • Comes with a good brush • Adaptable to any 1 ½” brush | • Learning curve |
Although this edging tool itself consists of a small plastic shield that is attached to a paintbrush, the remarkable flexibility this simple device brings may surprise you.
With just one piece of plastic, you can use the paintbrush with far greater confidence when painting walls and smaller areas.
The brush itself is just 1 ½” and does not drip. This means you can use it with paints along with stains and lacquers for most materials.
The good thing is you can attach the tool to other brushes that you own as long as they are the same size.
The shield is also detachable, which means if you want to soak up paint that’s trying to get through, you can attach it to a fabric pad. This is the type of versatility that is needed for many painting jobs.
Given how solid the Emery Edger Tool is, you get a product that will last a lifetime. Add to that the ability to paint both smooth and textured or rough surfaces, and you have an edger that works in most conditions as well.
Overall, for professionals, the Emery Paint Brush Edger Tool may be the perfect tool as it provides continued use over its lifetime. Plus, it can be attached to new brushes time and time again.
3- Mr. LongArm 0470 Trim Smart Paint Edger
- Horizontal and vertical guide wheels ensure sharp clean lines when...
- Swivel handle keeps paint pad flush with wall or other surface at any...
- Can be used by hand or attached to any standard threaded telescopic...
*Last update on 2026-03-30 / Affiliate links / Images from Amazon Product Advertising API
| What I Like | What I Don’t Like |
|---|---|
| • Inexpensive • Can be used with an extension pole | • Difficult to use properly • Pad refills are scarce |
As the name indicates, Mr. LongArm edger is designed to be used both up close and at a greater distance when reaching areas near the ceiling, for example, becomes difficult.
The main advantage is the ability of the edger to be attached to an extension pole which means you can stay on the floor and work near the ceiling.
Mr. LongArm Paint Edger is also inexpensive, so those on a budget will certainly have the option to pick up an edger that works. If you are going to use this product, I recommend you purchase the replacement pads well ahead of time.
All that said, keep in mind it does not work as well as the other edger tools on this list and will take practice to get the technique down. This means with Mr. LongArm edging tool; you will need time and patience to figure out how it will work for you.
It’s hard to argue with being inexpensive, even if it does come with certain issues. Plus, the ability to attach to an extension pole is considerable, especially when working with high walls.
If you have the money, then most of the other choices on this list are simply better. However, if you are on a budget and have the time to learn the best technique for edging, then Mr. LongArm 0470 Trim Smart Paint Edger may be the right product for you.
4- Wagner Spraytech SMART Edge Roller

- PAINT TRIMMING TOOL: The Wagner SMART Edge Roller home painting tool...
- HOLDS PAINT IN THE HANDLE: The paint roller draws paint directly into...
- APPLIES STRAIGHT LINES: The 3” Wagner paint roller delivers sharp...
*Last update on 2026-03-30 / Affiliate links / Images from Amazon Product Advertising API
| What I Like | What I Don’t Like |
|---|---|
| • Holds up to 6 oz. of paint • Thumb trigger provides considerable control • Sharp edges with no tapering • No tray; just pour the paint directly into the reservoir • Saves time when painting | • Smaller roller equals less coverage • May have to apply additional coats |
The first advantage you will see with the Wagner Smart Edge Roller is its simplicity.
Just fill up the tube with paint and press the plunger attachment on the back when applied to a wall. The paint will come out as you press, making this a convenient tool for most walls and tight areas.
This device holds a decent amount of paint, so you can paint up to 96 feet in a straight line on a full reservoir without having to refill. This may sometimes vary depending on the type of wall or surface you are painting.
The downside with this Wagner Smart Edge Roller is that the roller itself is relatively small, so while you get more control, you are covering a smaller area than the typical larger roller. Plus, unless you are consistent with the pressure applied to the paint, there may be thin spots that will have to be covered again.
It’s certainly easy to use, and most will quickly get the hang of it. And thanks to the large reservoir, you can quickly paint over long periods. These are more annoyances than actual issues, but if you are pressed for time, they can be problematic.
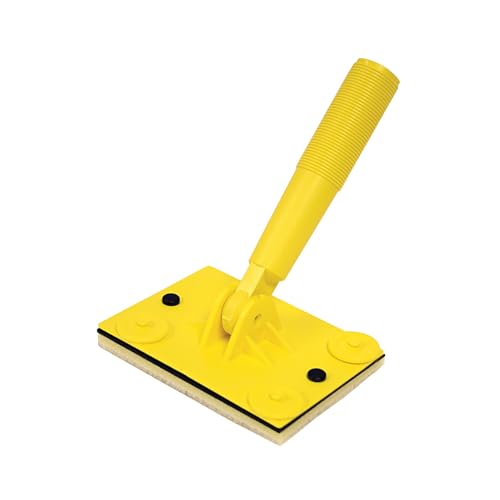
5- Shur-Line 500 Premium Paint Edger

- Paint Edger "Pro" model
- Handle Attaches To Threaded Extension Poles
- 180 degree swivel handle
*Last update on 2026-03-30 / Affiliate links / Images from Amazon Product Advertising API
| What I Like | What I Don’t Like |
|---|---|
| • Inexpensive • Durable, woven pad for straight lines • Can be used with extension poles • Intuitive to use • Lifetime warranty | • The gap between guide and protector |
The Shur-Line 500 Premium Paint Edger may be the perfect solution for those on a tight budget. In addition to being well-priced, the edger can be extended with the use of extension poles that are threatened for extra security.
This edging system uses a strong, woven pad to create smooth, straight lines that provide the right touch when painting. To keep the straight lines, the edger comes with guidewheels to give you even greater control. This includes when you are using extension poles.
The overall design of the Shur-Line 500 is to provide you with an exceptional edger that is also adjustable, making it easier to use. Plus, you can purchase extra pads to extend the life of this device.
Gaps are generally not something you want to see between the protector and guide, but in this case, the problem is more of a slight annoyance than a major issue. It means you sometimes need to adjust to ensure you get the right results.
Overall, the Shur-Line 500 Premium Paint Edger is exceptional, especially if you only paint occasionally – all thanks to its lifetime warranty. You can check the below video to get an idea of how to use this edging tool for painting and cutting through the edges.
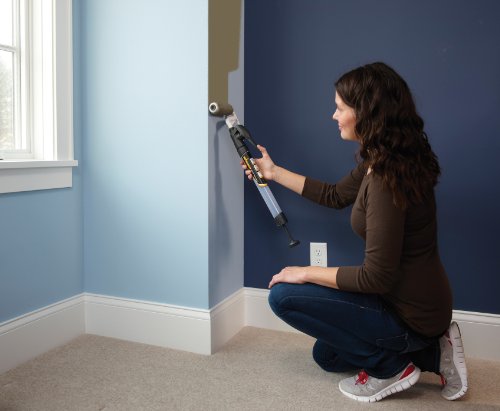
How to Use a Paint Edging Tool?
A typical paint edger will consist of a pad that features bristles and a couple of wheels on one side.
Basically, you put in the paint, align the pad with the edge, and keep the wheels on the outside. Then you run the pad along the edge to paint the molding or trim as needed.
Be aware that before you do all that, you will need to prep the area first to ensure that the pad runs smoothly and in a straight line.
It takes a little practice but can be done perfectly if you focus on the basics. And when it’s done correctly, you will have a smooth edge to the paint.
What follows are a few tips and steps that will help you gain experience and great results with a paint edging tool.
Step 1- Prepare
Lay down a drop cloth, tape off areas you do not want to have painted, and then wipe down the surface. This only takes a moment, so do not rush the process, but do not dawdle or become overly concerned.
Step 2- Set Up
You will need a Paint Edger along with a rolling tray and a paper plate.
The paper plate can hold the paint and be thrown away when it’s no longer needed. The rolling tray can be used when you can remove any excess paint after the edge for reuse.
Step 3- Apply the Edger
Apply a liberal amount of paint to the edger pad and remove any excess on the ridges of the rolling tray. Now, roll the edger along with the trim or molding while giving a nice, even stroke to apply the paint smoothly.
And that is it. You may apply a second coat if you want a darker color or need more thickness. Do not forget to clean the edger once you are done.

What to Look for in a Paint Edger?
Considering this is important because while there are five recommended products (mentioned above), they operate in a different fashion to meet different needs. Understanding your needs and capabilities is essential in finding a suitable edger.
a) Size:
Get an edger large enough to produce the desired results while being small enough to be easy to control. It’s good to purchase two different size edger tools; or one large edger tool along with a small shield for your roller or brush.
b) Extender:
Getting an extender or extension pole is recommended, mainly if you need to paint a large surface, high walls, and ceilings. This allows you to stay in one place and cover a larger area. Edger tool kits with extenders may also be a good option for you to consider.
c) Choose between pads or rollers:
The pad option offers a fabric texture that you can use by dipping it into your paint and sliding across walls for an easy spread of color, but beware – there is greater risk with this approach when leaving lines in the fresh coat.
Alternatively, opting for a roller creates more resemblance to larger-scaled wall painting as long as its flocked surface rotates smoothly along surfaces during the application, taking extra caution not to let precision slip away!
In either case, finding something light yet firm enough so movement won’t be interrupted is critical. Choosing wisely will result in beautiful finishes each & every time!
Roll-On Edger vs. Smear-On Edger
Roll-On is a paint roller that is small-flocked and uses a shield to provide an edge. This allows you to apply the paint where you want quickly by loading the roller with the paint you want and applying it where needed.
Smear-On is a pad that lets you spread the paint across a flat surface. Such devices may be dipped or have a tube that can be filled with paint. However, the pad is usually small, so the paint will have to be reloaded frequently unless it is connected to a tube.
When you want to pick a roll-on edger (over a smear-on edger tool), take a look at the type of shield that it comes with. This can be a metal or plastic shield attached to a roll-on edger.
While plastic shields are cheap, metal shields tend to be better because the edges they produce are sharper. This means they provide greater control.
Brush vs. Pad Edger vs. Painter’s Tape?
The typical areas where the paint needs to be cut in include the following.
- Windows & Doors
- Above Baseboards & Below Ceiling Trim
- Woodwork like Floorboards and many others
There are additional areas, such as doorknobs, the area underneath electrical fixtures that have been removed, and the like.
While you may have noticed that professional painters will most often use a brush, a good paint edger can be faster and cleaner to cut in. In many cases, applying masking tape will provide the protection needed however, it’s not always practical or convenient to use.
Brush:
The pros prefer a brush because it can hold more paint compared to the pad on a paint edger. This means a painter has more control when using a brush, especially in tight corners.
Flat sash and angle sash brushes (2- or 3-inch) from brands like Purdy and Wooster are some of the best ones you can use for sharp edges.
As these are specially designed for cutting and fixing messy paint edges, you can cut around some features (such as doorknobs and other rounded items) much faster.
However, one downside is that a brush may spread its bristles too far apart, which results in a rough or irregular edge that needs to be repainted.
Pad Edger:
If you do not overload the pad with paint, you can create a clean edge. And that’s the reason the edger works best when applied in straight lines.
Going around curves is not recommended, as it can leave streaks or thinner areas of paint. If you have an edger with wheels, you can move it even faster. However, this also may leave gaps for you to fill in.
Based on my experience, I can say that the best choice is to have a pad edger and brush for edging work. The brush is for curved areas, and the pad edger is for longer, straight areas.
Roll the paint quickly after cutting in for the best look. However, if you are painting an entire room, then you’ll want to work one wall at a time, with the ceiling being last.
Painter’s tape:
A cheaper solution to the above tools is painter’s tape which can be applied to almost any surface and stick, but not to the point where it is difficult to remove.
For smaller areas, painter’s tape is arguably the most effective solution for edging. However, for larger walls or surfaces, you will need a good paint edger tool as painter’s tape can often be inaccurate and messy here.

Best Tips for Cutting-in Paint – Like A Pro
Mowing the lawn can be easy; it’s edging, which is the hard part.
The same can be said for painting, as cutting is the most challenging skill to develop and master.
You can put masking tape everywhere to create sharp edges, but if you master the skill of proper cutting, you can do the work in a fraction of the time and get professional results.
Here are the six tips to help you cut paint like a pro, getting the results you want while not wasting time or masking tape.
1- Gradual Approach
Instead of painting along the line right from the start, work your way up to it using a gradual approach. This means using a crescent-shaped motion first to run the paint near the edge. Then on your next stroke, get a little closer. Let the strokes get a little closer each time without reloading the paintbrush. This will eventually let you paint the edge smoothly.
2- Keep Steady
The key to effective paint cutting is a steady hand that moves quickly.
As you gradually get closer, do so with fast strokes that keep the paint even when applied. Try to cut along the line on your second or, preferably, third pass. This will let you cut along the trim while maintaining an even stroke. The result will be less curving or getting paint on the trim.
3- Pat Away the Excess Paint
Do not wipe the sides of the brush, which is tempting. But you will need the paint on the sides to cut correctly. So, gently pat the excess paint on the side of the bucket to get rid of any drips. This will give you enough paint to work with and get smooth, clean lines.
4- Use Just Enough Paint
You can do this by pouring the paint into a small container – a paint pail that is just large enough for your brush to allow you to cut properly. The ideal amount is about an inch of paint on the brush. This will keep just enough paint to do the job without having too much present.
5- Wiggle into The Corners
When painting tight corners, you can wiggle the brush to release just enough paint to fill in the area. This is a simple technique for filling in small, tight corners that otherwise might escape the brush itself.
Remember to wiggle just enough to release the paint, as too much will be noticeable.
6- Carry a Putty Knife & Damp Rag
A good putty knife can make up for any mistakes with a damp rag attached. One wrap of a damp rag around a putty knife can wipe away the excess quickly and neatly. Have it handy so that you can do this right away.
Related FAQs
Do you cut in before or after rolling?
If you use latex paint that dries fast, you can cut around your trims either before or after rolling.
However, if you use oil-based enamel paint for walls, it’s good to cut in after you roll your walls. This will help you to neaten paint edges and get the perfect finish.
Should you cut in with every coat of paint?
If you are applying a second coat, it’s also good to cut in again. Make sure you do not cut in twice (at a time) and then roll.
You should instead cut in once and then roll on one paint coat. And then, cut in again to apply another coat with a roller. This will provide a nice smooth finish.
Is it OK to cut in one day and paint the next?
Cutting in with one wall and then rolling out the wall immediately will help you get a far better finish without any lap marks.
If you decide to cut in today and paint the next day, the two paints (dried cut-in and wet on the walls) will not blend much better and may get a chance of leaving lap marks.
The Bottom Line
Picking a suitable paint edger is the right thing to do as it eliminates all the hassles that come across when using techniques and tools such as cutting in, masking tape, paint brushes, etc.
If you do not want to get the paint everywhere and avoid the mess at the end, you can consider picking my favorite Accubrush MX Paint Edger at stores like Amazon, where it’s available at the most affordable pricing.
Due to its versatility and ability to be used for multiple purposes, I highly recommend this to anyone who wants to get a DIY project done most accurately. I believe – this is a faithful companion when painting the edges and corners without tape.
Share the post "The 5 Best Paint Edger Tools of 2026"

From building furniture and refurbishing existing furnishings to touching up the doors, tables, and other wooden pieces in your home, Read more

You are in the middle of sanding your walls, and you realize that there are still many more pieces of Read more

I remember the early days when my father, as a painter, did not have many options for spraying the cabinets Read more

Got a DIY spray painting project that you’re anxious to get rightly done? Maybe a paint spray shield (or a Read more

Jack Luis is a semi-retired painter who loved painting his clients’ ideas on their walls.
He had worked as a painter for over a decade serving customers in areas such as Charleston, Mount Pleasant, Beaufort, and Georgetown, SC (South Carolina). Today in his free time, he likes to read and write about the newer techniques implemented in his profession. You may read more about him here or get in touch with him here.