
There’s a certain romance to a backyard gazebo—until mildew crashes the party.
That once-inviting retreat can quickly turn into a blotchy, greenish-gray eyesore, especially in humid climates or shaded yards.
And when mildew sets in, many homeowners ask the obvious question: Is this salvageable… or am I looking at a full replacement?
Here’s the good news—you can absolutely restore a mildewed gazebo.
Not only that, with the right prep, materials, and technique, you can make it look better (and last longer) than it did when it was new.
This guide walks you through the why, whether, and how—from the science behind mildew growth to the exact steps needed to clean, prime, and repaint like a pro.
I’ll also touch on color ideas that elevate your outdoor space instead of just covering up the problem.
Main Causes of Mildew on Gazebo
Before you grab a paintbrush, it’s worth understanding your opponent.
Mildew is a type of fungus—less aggressive than mold, but still persistent. It thrives in specific conditions, and unfortunately, gazebos tend to offer a perfect habitat.
1. Moisture Retention – Rain, humidity, and morning dew all contribute to prolonged dampness. Wood especially absorbs moisture, creating an ideal breeding ground.
2. Poor Sunlight Exposure – Gazebos tucked under trees or facing north don’t dry out quickly. Less UV exposure means mildew spores survive longer.
3. Organic Material Build-Up – Leaves, pollen, dirt, and bird droppings—these aren’t just messy, they’re food sources for mildew.
4. Inadequate Ventilation – Closed or partially enclosed gazebos trap humidity. Airflow is your invisible ally; without it, mildew thrives.
5. Old or Failing Paint/Sealant – Cracked or peeling coatings allow moisture to seep into surfaces. Once inside, mildew gets comfortable fast.

Can You Paint the Mildewed Gazebos?
Short answer: Yes—but not directly.
Painting over mildew without treating it first is a bit like putting a bandage on a leaking pipe.
It may look fine for a short while, but underneath, the problem keeps growing—and eventually shows up again, often worse than before.
Mildew isn’t just a surface stain; it’s a living organism that needs to be properly eliminated before any coating goes on top.
The right approach is straightforward, but it requires discipline. First, you need to completely kill and remove the mildew.
Then, the surface must be properly cleaned, dried, and prepped so paint can adhere effectively. Finally, you should apply high-quality mildew-resistant coatings designed for outdoor exposure.
Only when these three steps are followed does painting become a long-term solution rather than a temporary cover-up.
How to Clean and Paint a Mildewed Gazebo?
This is where the transformation happens. Take your time here—rushing prep is the number one reason paint jobs fail.
What follows is the detailed step-by-step process to apply the primer and paint to your gazebo/pergola.
Step 1- Check the Wood Moisture
Before you start painting, the conditions will need to be right. This means the moisture content of the wood cannot exceed 20%.
You can learn about the type of wood present, which will guide you on its moisture content, or borrow an electronic moisture meter that will provide current measurements.
If the percentage is above 20%, then you will need to wait at least a month or longer for the moisture to drop to the appropriate levels.
At that point, you can purchase the acrylic latex primer, which prevents excess moisture from being held in the wood when painted. Do not use an oil-based primer, as that will not work properly under such conditions.
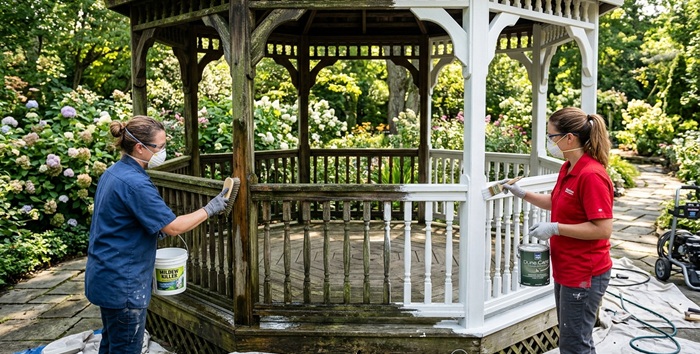
Step 2- Clean, Rinse, Dry, and Sand
Before painting, you must completely clean mold off a gazebo—otherwise, it will keep growing under the paint.
Use a solution of 1 part bleach to 3 parts water or a commercial mildew remover.
Scrub gently with a soft-bristle brush, let it sit for 10–15 minutes, then rinse thoroughly. Avoid high-pressure washing on wood, as it can damage the surface.
Next, let the gazebo dry fully for 24–48 hours. Moisture trapped inside can cause peeling later.
Once dry, sand the surface to remove residue, smooth rough areas, and improve paint adhesion. For metal, use a wire brush to remove rust before moving ahead.
Step 3- Inspect the Lead Paint Presence
If the gazebo was built before 1978, there is a chance it may have lead paint.
You’ll want to obtain a lead test kit from the Environmental Protection Agency (EPA) in the United States. You can find them at your local hardware store or order them online if necessary.
If lead paint is detected, you will need to have a certified professional in the removal of lead-based paint take away all traces before you do any more work on the wood.
Once the lead has been removed, sand and scrape any other paint that might be remaining. Then, pressure wash the exposed wood and let it thoroughly dry.
Now, you can apply the acrylic latex primer as the first coat.
Step 4- First Primer, then Paint the Sides
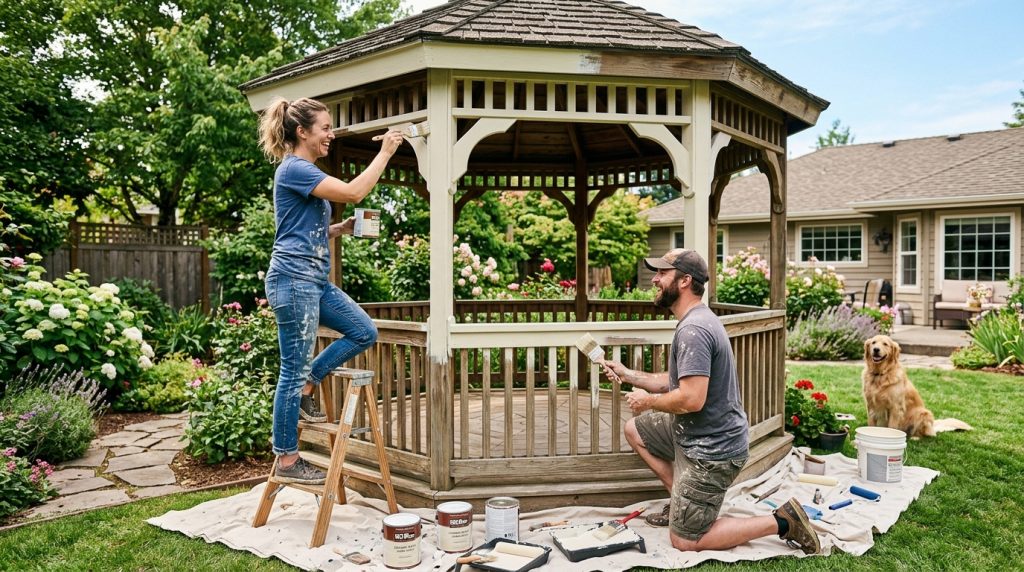
The acrylic latex primer should be applied to the gazebo first. This means sanding to smooth out any rough areas and pressure washing to get rid of any buildup of dirt and debris.
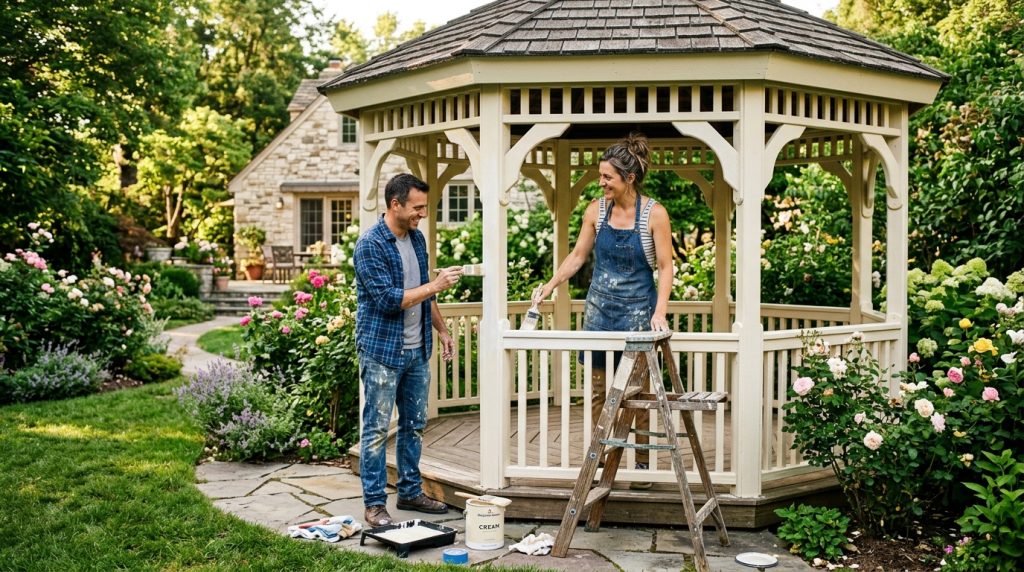
Apply an even coat of primer to the entire gazebo and let it dry. Now start painting the sides of your gazebo (the support columns that hold up the roof and any wood railings or frieze that may be attached below the eaves).
You can use exterior paint just like you would for your home. It is best to apply two coats of paint over the primer for maximum protection. Plus, it will hide the color of the primer used as well.
Acrylic latex is generally the best because it can expand and contract along with the wood when the temperature changes. This will lower the chances of cracking or blistering in the paint. Also, it is best to choose eggshell, glossy sheen, or satin, as this will make dirt, debris, and handprints easier to wipe away.
Apply the paint with a synthetic brush of high quality to ensure that the finish is smooth and clean. The quality of the brush will lessen the chances of having brush strokes or streaks in the paint.
Step 5- Finally Paint the Ceiling & Flooring
The next step is painting the ceiling of your gazebo. For painting the ceiling of your gazebo, you will want to use paint that is made for porch ceilings.
This type of exterior paint formulation will lessen the chances of splatter and have components that will destroy any mold or mildew that might try to attach to the ceiling.
You can use a paint roller with a pole extension to apply the paint, but after covering most of the surface, you may need to climb a ladder and apply the paint to the edges with a brush.
Finally, you can paint the floor of the gazebo or pergola using tough acrylic latex paint that is meant for the porch floor.
These coatings are not only abrasion-resistant but also moisture-resistant, which will ensure that your gazebo’s wood floor stays protected for long from ongoing foot traffic and harsh weather elements.

Best Paints to Use for Metal and Wood Gazebos
When it comes to choosing the best paint for gazebo surfaces, one size definitely does not fit all.
The material of your gazebo—wood or metal—determines everything from prep work to the type of coating that will perform best over time.
Wood Gazebos
Wood is naturally porous, which means it absorbs moisture easily.
That’s great for plants—not so great for structures. Because of this, wood requires coatings that strike a balance between protection and breathability.
Acrylic latex exterior paint is often the go-to choice here. It expands and contracts with temperature changes, resists cracking, and allows trapped moisture to escape—reducing the chances of future mildew growth.
If you prefer a more natural aesthetic, a solid stain can provide protection while still showcasing the wood’s texture.
For older or heavily weathered structures, a combination of oil-based primer followed by a latex topcoat offers excellent adhesion and durability.
The key detail many people overlook? Always check for mildew-resistant properties. This isn’t just a bonus feature—it’s essential for outdoor longevity.
Metal Gazebos
Metal, unlike wood, doesn’t absorb moisture—but it has its own enemy: rust. That’s why coatings for metal roofs of gazebos are designed more for corrosion resistance than breathability.
Rust-inhibiting enamel paints are a popular and reliable option, forming a tough barrier against moisture and oxidation.
Acrylic DTM (Direct-to-Metal) paints simplify the process by adhering directly to metal surfaces while still offering solid protection.
For those looking for maximum durability—especially in harsh weather conditions—epoxy-based coatings provide a harder, more industrial-grade finish.
If you’re planning to paint metal gazebo structures, priming isn’t optional—it’s critical. A proper rust-inhibiting primer ensures adhesion and significantly extends the life of your paint job.
| Gazebo Material | Paint Type | Key Benefits | When to Use |
|---|---|---|---|
| Wood | Acrylic Latex Paint | Breathable, flexible, mildew-resistant | Most standard outdoor applications |
| Wood | Solid Stain | Natural look, good protection | When you want visible wood texture |
| Wood | Oil Primer + Latex Topcoat | Strong adhesion, long-lasting finish | Heavily weathered or older wood |
| Metal | Rust-Inhibiting Enamel | Prevents rust, durable finish | General metal protection |
| Metal | Acrylic DTM Paint | Direct application, good adhesion | Faster projects with fewer steps |
| Metal | Epoxy-Based Coating | Durability, industrial-grade protection | High exposure to moisture or harsh conditions |
Outdoor Gazebo Color Ideas – Best Shades for Pergolas
Now for the fun part—style.
A gazebo isn’t just a structure sitting in your backyard; it’s a visual anchor. The right color can make it feel like a natural extension of your home—or a standout feature that elevates the entire outdoor space.
And while aesthetics matter, smart color choices also help with maintenance, heat reflection, and even how spacious the structure feels.
Let’s break down some of the most effective and popular options in a bit more detail.
1. Classic White
There’s a reason white gazebos never go out of style—it’s the architectural equivalent of a crisp white shirt. Clean, elegant, and universally compatible.
White works exceptionally well in gardens filled with greenery because it creates contrast without overpowering the natural surroundings.
White on ceilings also reflects sunlight, which helps keep the structure cooler during hot summer days. If your gazebo is used for daytime relaxation or entertaining, this is a subtle but real advantage.
That said, white does demand a bit more upkeep. Dirt, mildew, and dust are more visible, so occasional cleaning is part of the deal. Using a high-quality exterior paint with mildew resistance helps reduce that burden significantly.
2. Charcoal Gray
If white is classic, charcoal gray is confidently modern.
This shade has gained popularity for its sleek, contemporary feel. It pairs beautifully with stone patios, metal furniture, and minimalist landscaping.
One of its biggest advantages is practicality—charcoal gray does an excellent job of hiding dirt, dust, and minor imperfections, making it a low-maintenance choice.
It also adds visual weight to your structure, making the gazebo feel more grounded and substantial. If your home exterior features darker trims or roofing, charcoal gray creates a cohesive, designer-like finish.
3. Natural Wood Tones
For those who prefer an organic, earthy look, natural wood tones are hard to beat.
Instead of covering the material completely, these tones enhance the wood’s grain and texture, giving the gazebo a warm, inviting feel.
This style works especially well in rustic settings, cottage gardens, or spaces with lots of plants and natural elements.
From light cedar to deep walnut shades, you have flexibility in how bold or subtle you want the finish to be. Pairing this with the right paint for gazebo ceiling (often a lighter tone) can create a beautiful contrast while maintaining that natural vibe.
The only caveat? Maintenance. Wood finishes may need reapplication every couple of years to retain their richness and protection.
4. Soft Beige or Sand
If you’re aiming for subtle elegance, soft beige or sand tones are an excellent choice.
These neutral shades blend seamlessly with outdoor environments, especially in landscapes with stone, gravel, or desert-style planting. They don’t demand attention—but they quietly elevate the space.
Beige tones are also forgiving when it comes to dust and dirt, making them a practical middle ground between white and darker shades. They reflect enough light to keep the space bright without feeling stark.
For homeowners who want their gazebo to complement rather than dominate, this is often the best color for gazebo setups.
5. Two-Tone Combinations
If you want your gazebo to look like it belongs in a design magazine, two-tone combinations are where things get interesting.
The idea is simple: use contrasting shades to highlight architectural elements. For example, white posts paired with a dark gray or black roof create a striking visual frame. Similarly, neutral walls with darker trims can add depth and definition.
Two-tone designs aren’t just about aesthetics—they also help break visual monotony, especially in larger structures. This approach works particularly well when you’re painting the sides of gazebo panels and want to emphasize structure and symmetry.
A practical tip: keep the ceiling lighter than the rest of the structure. It reflects more light and makes the interior feel more open and airy.
Bringing it all together…
When exploring outdoor gazebo color ideas, don’t think of your gazebo in isolation. Look at your home’s exterior, your landscaping, and even your outdoor furniture. The goal is cohesion, not competition.
If you’re browsing painted gazebo ideas, a reliable formula is this:
- Lighter ceilings to enhance brightness
- Mid-tone main structure for balance
- Darker trims or accents for definition
It’s a simple combination—but when executed well, it creates a polished, high-end look without overcomplicating the design.
In the end, the best color choice isn’t just about trends—it’s about how the space feels when you step into it.
Related FAQs
Gazebo vs. pergola – what’s the difference?
At a glance, gazebos and pergolas may look similar, but their functionality sets them apart. A gazebo typically features a fully covered roof, offering complete protection from sun and rain, making it ideal for seating areas or outdoor entertaining in all weather.
A pergola, on the other hand, has a slatted or open roof design that allows filtered sunlight to pass through, creating a more airy, decorative feel. Pergolas are often used to enhance pathways or garden aesthetics.
Regardless of which you have, a proper paint job not only improves appearance but also protects the structure from weather damage over time.
How do you clean a colorfully painted gazebo?
Cleaning a painted gazebo requires a gentle approach to preserve the finish. A simple solution of one part white vinegar to three parts water works effectively for routine cleaning.
Apply it using a soft sponge or cloth, and scrub lightly to remove dirt, mildew, or stains without damaging the paint. Rinse thoroughly with clean water and allow it to dry completely.
For tougher buildup, you can use a slightly stronger cleaner—but only if necessary. If you’re planning to repaint, a deeper clean is helpful; otherwise, stick to mild solutions to maintain the existing coating.
Can you spray paint a gazebo roof and structure?
Yes, using a paint sprayer can be an efficient way to coat a gazebo, especially for larger or detailed surfaces. The key is proper technique—keep the sprayer moving consistently to avoid drips, uneven patches, or overspray buildup.
Use paint or stain that’s appropriately thinned and suited to the material, whether wood or metal. After spraying, it’s often recommended to back-brush the surface to ensure the coating penetrates corners and joints.
Multiple thin coats yield better results than one heavy coat. Always allow sufficient drying time between layers for a durable, professional-looking finish.
Can you paint a gazebo canopy?
Yes, you can paint a gazebo canopy—but the method depends on the material. For hard surfaces like vinyl or metal, start by cleaning thoroughly with mild soap and water, then apply a suitable primer to ensure proper adhesion.
Follow up with multiple thin coats of outdoor-safe paint, allowing each coat to dry completely. If your canopy is made of fabric or canvas, traditional paint won’t work well—instead, use fabric-specific dyes or paints designed to flex without cracking.
Proper preparation is key here; skipping primer or using the wrong product can lead to peeling or uneven results.
How do you prevent mold and mildew on a gazebo?
Preventing mold and mildew is far easier than dealing with it later. Start by improving air circulation—trim nearby plants and avoid overcrowding the structure.
Regular cleaning every few months helps stop buildup before it becomes a problem. For wooden gazebos, applying a protective sealant every 1–2 years adds a crucial moisture barrier.
Using a high-quality, mildew-resistant coating—ideally, the best paint for gazebo surfaces—provides long-term protection.
Finally, address moisture at the source: ensure proper drainage and avoid water pooling around the base. A dry gazebo is a mildew-resistant gazebo.
The bottom line
A mildewed gazebo might look like a lost cause—but it’s usually just a neglected one.
With proper cleaning, smart material choices, and a bit of patience, you can turn that tired structure into a standout feature of your outdoor space. And once you’ve done it right, maintenance becomes easier, not harder.
Think of it less as a chore—and more as an upgrade. Because a well-painted gazebo doesn’t just sit in your yard…
Share the post "Can You Paint the Mildewed Gazebo?"

Your basement is the perfect spot for building rooms you may not want in the main house. These may include Read more

Drywall is basically a panel composed of calcium sulfate dihydrate or gypsum. Other names include plasterboard, wallboard, sheetrock, gypsum board, Read more

Repainting the wooden window frames of your house is like putting on a nice, new summer dress after a long, Read more

While brushes and rollers are the traditional means of painting walls, spray paint is coming more in favor. For many Read more

Jack Luis is a semi-retired painter who loved painting his clients’ ideas on their walls.
He had worked as a painter for over a decade serving customers in areas such as Charleston, Mount Pleasant, Beaufort, and Georgetown, SC (South Carolina). Today in his free time, he likes to read and write about the newer techniques implemented in his profession. You may read more about him here or get in touch with him here.