

The biggest time-saver deal, in my opinion, is pre-finishing your material before it’s put up.
When finishing wooden wainscoting, this means that, whether you plan to paint or stain it, this step should be completed beforehand to make things easier.
It’s also critical to ensure that the entire tongue part of the wooden wainscoting is covered. Since wood can shrink after it has been installed, any gaps will be more noticeable once the paint or stain has dried.
If you’re not finishing your wood wainscoting and are instead going for a natural look, it’s still important to at least seal the molding before installation.
After all, sealing is a pretty quick process and will protect the wood from moisture or rot over time.
Benefits of Painting Wainscot before Installation
Painting your panels before they hit the wall is a classic “work smarter, not harder” move.
Whether you are dealing with traditional wood or modern PVC wainscot, finishing the material on sawhorses or a workbench saves your back and your carpet.
Here are five key benefits of painting before installation:
1. Superior coverage and consistency
When you paint wainscoting paneling while it is lying flat, you eliminate the risk of unsightly drips and sags caused by gravity.
You can achieve a factory-like finish because you aren’t fighting awkward angles or corners.
This is especially helpful if you are choosing to have your wainscoting painted white, as light colors often require multiple thin, even coats to look professional.
2. No more shrink lines
Wood expands and contracts with changes in humidity. If you install raw wood and then paint it, the wood may eventually shrink, revealing unpainted “gaps” at the joints or tongues.
Pre-painting ensures that every edge is sealed, so when the house breathes, the finish remains seamless and unbroken.
3. Protection for the material
If you need to paint over stained wainscoting to give an old room a facelift, doing so before re-installation allows for better chemical adhesion and sanding.
Applying a primer and topcoat to all sides of the board—including the back—helps seal the material against moisture. This is vital for wainscoting walls in high-moisture areas like bathrooms or mudrooms.
4. Zero mess and masking
Painting in a garage or workshop means you don’t have to spend hours taping off floors, baseboards, or upper walls.
You won’t have to worry about paint splatter on your hardwood or “cutting in” against a delicate wallpaper. It turns a high-stress precision job into a quick, breezy project.
5. Perfect transitions
Installing pre-painted pieces allows for much cleaner caulking and touch-ups. Since the bulk of the color is already there, you only need to dab a tiny bit of paint onto the nail holes.
This prevents the “blobby” look that often happens when trying to force a thick brush into tight corners after the panels are already fixed to the wall.
But Can I Paint the Wainscoting after Installation?
Since there is no specific rule, it’s okay to paint the wainscoting and the walls after installation.
It’s just that the entire process would be a bit more time-consuming and expensive because you’ll have to take extra care not to get paint on the wall or floor, and you’ll also need to use a brush rather than a roller.
If you want to finish your wainscoting after mounting, I suggest cutting and priming down the material before installation, then applying a single paint coat of your choice and allowing it to dry.
You may then finish by putting a coat of paint over the surface after the installation.
It’s basically as simple as purchasing pre-primed wainscoting and applying the final paint/ stain coat on it after you have successfully installed it.
This way, you get chances to fix any gaps or holes that might have occurred during installation, giving a much neater look.

What Color and Finish to Use for Wainscoting Panel?
Many people consider painting wainscoting the same color as the wall. And others paint it the same color as the trim.
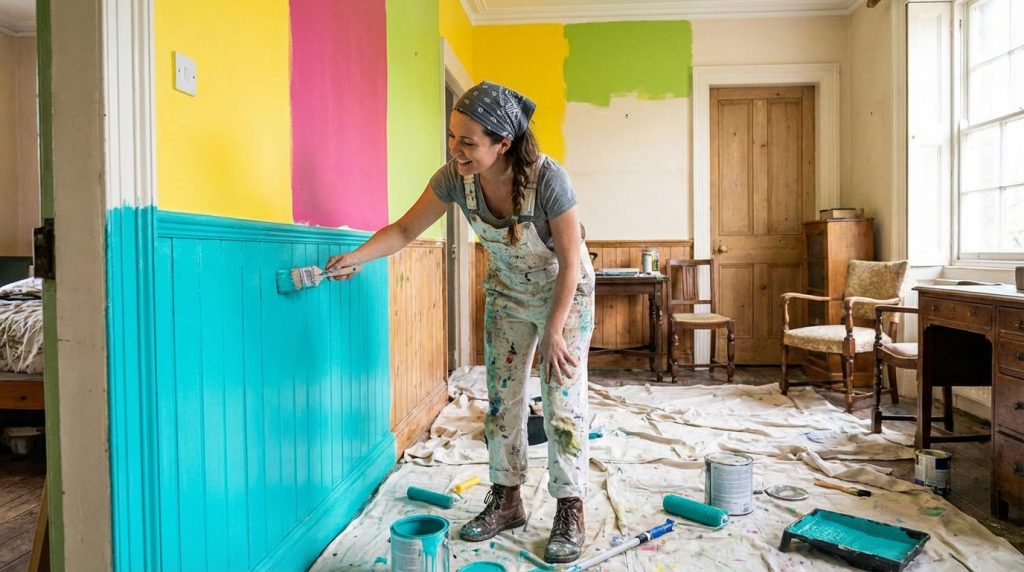
If you want to add some extra pop to your room, painting the wainscoting a different color is a great way to do it – get creative and use two colors or even a pattern.
You could even go for a two-tone look and paint the top half of the wainscoting one color and the bottom half another.
IMO, the location and the room where you are putting up the wainscoting matter the most when deciding what color to paint it.
For example, if you were putting up wainscoting in a bathroom that had white walls, you might want to continue with the white theme and paint the wainscoting white as well.
But if you were putting up wainscoting in a living room with tan walls, you can paint it a rich brown color to match the furniture.
For kitchen or dining room wainscoting, you may use darker colors like chocolate brown or coffee to make it feel more like a formal dining room.
Some other popular wainscoting colors are grey, blue, and green. Overall, it depends on the look you are going for in the room.
Best paint finish for wainscoting?
Choosing the right sheen for your wainscoting is just as important as the color. Since this architectural detail sits on the lower half of the wall, it lives in the “danger zone” for scuff marks, vacuum cleaner bumps, and sticky fingerprints.
If you are working with older wood or DIY panels that have a few dings and scratches, satin is a forgiving middle ground.
However, if you want that crisp, classic “trim” look that defines traditional wainscoting, semi-gloss is the way to go. It provides that signature “snap” against the wall color that makes the installation look expensive.
In general, wainscoting painted semi-gloss is the industry standard, and for several good reasons.
Durability and Cleanability: Semi-gloss creates a hard, slick film that resists moisture and staining.
Because wainscoting often features grooves and recessed panels, it tends to collect dust. A higher sheen allows you to wipe it down with a damp cloth without buffing the paint off.
Visual Contrast: Most homeowners use a “Flat” or “Eggshell” finish on the upper portion of the wall.
Using a semi-gloss on the panels creates a sophisticated texture play. The light reflects off the trim, making the architectural details and shadows pop, which adds depth to the room.
While semi-gloss is the favorite, remember that the “best” finish depends on your specific goals:
| Finish | Best For… | Pro/Con |
| Satin | High-traffic areas where you want a modern, “velvety” look. | Better at hiding imperfections in the wood than glossier options. |
| Semi-Gloss | The Gold Standard. Bathrooms, hallways, and kitchens. | Highly durable and easy to clean, but highlights poor sanding jobs. |
| High-Gloss | Dramatic, high-end formal dining rooms or entryways. | Stunning and mirror-like, but requires a perfectly smooth surface. |
Can I Paint My Wall a Different Color Than the Wainscoting?
Painting your walls a different color from your wainscoting is one of the most effective ways to add architectural depth and personality to a room.
In fact, when you decouple the colors of your upper wall and lower paneling, you create a visual “anchor.”
Here are the three most popular approaches:
- Classic Contrast: Use crisp white or off-white wainscoting paired with a bold or deep color on the top (like navy, sage, or terracotta). This creates a clean, traditional look that feels structured.
- The “Moody” Reverse: Flip the script by painting the wainscoting a dark, dramatic shade and keeping the upper walls a light neutral. This draws the eye downward and makes the room feel grounded.
- Tone-on-Tone: Choose two different shades of the same color family—for example, a light sky blue on top and a dusty slate on the bottom. This offers variety without the visual “break” of high contrast.
Can you paint a wall to look like wainscoting?
Yes, and it’s a brilliant “rental-friendly” or budget-friendly hack. This is often called faux wainscoting and is a popular option when you need to add wainscoting to your bathroom or kitchen.
To achieve this, you simply use painter’s tape to create a horizontal line (usually about 32 to 36 inches from the floor) and paint the bottom section a different color.
To make it look more authentic, many DIYers add thin lattice strips or picture frame molding over the painted area to create real shadows and texture.
Even without the wood trim, a “half-painted wall” defines the space similarly to real paneling, giving you that high-end architectural feel for the price of a single gallon of paint.
Tips for Installing and Painting the Wainscoting Paneling Correctly
Refining your interior with wainscoting is the architectural equivalent of trading a t-shirt for a tailored blazer.
While the terms are often used interchangeably, wainscoting is the broad category of decorative paneling applied to the lower portion of a wall, typically capped by a chair rail.
Beadboard is simply a specific style featuring those iconic vertical grooves (the “beads”).
Here is how to execute a professional-grade installation while avoiding the common pitfalls of DIY projects.
1. Surveying the architectural canvas
Before you start swinging a hammer, you need a precise game plan.
Measure the linear footage of your room and calculate the number of panels required, factoring in a 5-10% waste margin for miscuts.
If you are dealing with old, rotten wainscoting from a previous era, strip it back entirely to inspect the studs for moisture damage or mold—especially if this is a high-humidity area like a bathroom or a mudroom. Clean the slate so your new installation has a flat, structural foundation.
2. Strategic demolition and prep
Precision starts with what you remove, not just what you add. Use a stiff putty knife and a pry bar to gently release the existing baseboards and casing; if you’re careful, you can reuse them.
Clear the field by removing all electrical faceplates—and please, don’t just paint around them.
While the “pro vs. amateur” debate rages on, true pros know that a clean finish requires the wainscot to tuck neatly behind the plate for a flush, seamless look.
3. Layout and the level
Houses are rarely square, and floors are notorious liars. Use a stud finder to locate and mark your framing members.
Instead of measuring up from the floor at every point, find the highest point of your floor, mark your desired height (commonly 32 to 42 inches), and use a laser level or a long spirit level to snap a chalk line around the perimeter.
This ensures your beaded white panels look straight even if your house is slightly “charming” (crooked).
4. Material selection
Your environment dictates your material. For a budget-friendly, stable finish in dry areas, MDF wainscoting (Medium Density Fiberboard) is king because it doesn’t expand and contract like natural wood.
However, if you are installing paneling in the ceiling of a porch or in a bathroom, opt for PVC or pressure-treated wood to fight off the elements.
Natural varnished oak offers a timeless aesthetic but requires a much higher level of joinery skill to prevent gaps during seasonal shifts.
5. Precision cutting and scribing
Once your layout is set, cut your panels to height using a miter saw for clean ends or a circular saw with a fine-finish blade (60+ teeth).
When hitting a corner, don’t assume it’s a perfect 90 degrees. Measure the top and bottom widths separately and “scribe” the board to the wall.
To allow for natural material expansion, leave a 1/8-inch gap at the corners; this small “breathing room” will eventually be hidden by your molding or a bead of high-quality caulk.
6. The “two-tone” aesthetic and priming
If you’re going for a modern two-tone look—where the wainscoting is a different color than the upper wall—it is significantly easier to prime and paint your panels before they hit the wall.
Sand the surfaces with 220-grit sandpaper to open the pores, then apply a high-hide primer like KILZ or Zinsser. This prevents the “tannin bleed” common in wood and ensures your topcoat adheres to the slick surface of MDF without peeling later.
7. Professional spraying techniques
For a factory-perfect finish without brush marks, consider a white spray paint application using an HVLP (High Volume, Low Pressure) sprayer.
If you’re working indoors, ensure proper ventilation and masking. Spraying into the deep grooves of beadboard ensures total coverage that a roller simply can’t match.
If you must use a brush, use a synthetic angled sash brush and “tip off” the paint in long, fluid strokes to minimize texture.
8. Structural adhesion and nailing
When it’s time to hang the panels, don’t rely on nails alone. Apply a “snake” pattern of construction adhesive (like Liquid Nails) to the back of the panel.
Press it to the wall, pull it back for a moment to let the solvent tack up, then press it back firmly.
Drive 18-gauge brad nails into the studs at an angle. To be truly “technical,” aim for the “tongue” of the board or the grooves where the nail head will be naturally camouflaged.
9. Joinery and corner transitions
Inside corners are best handled with a coped joint rather than a simple miter; this involves cutting one board square and “coping” the profile of the second board to fit over it, which prevents gaps when the house settles.
For outside corners, a mitered cut glued with cyanoacrylate (super glue) ensures the tip stays tight. Once the panels are in, install your chair rail and baseboard to “sandwich” the panels securely in place.
10. The finishing touch: caulk and fill
The difference between “I did it myself” and “I’m a master carpenter” is in the caulk.
Fill your nail holes with a non-shrinking wood filler or painter’s putty. Use a paintable siliconized acrylic caulk for the seams where the wainscoting meets the wall and the trim.
This creates a waterproof seal and a visual bridge that makes the installation look like an original part of the architecture. Give it one final “touch-up” coat of semi-gloss, and you’re done.
Related FAQs
Should old wainscoting be painted white?
Painting old wainscoting white is a popular way to brighten a room and create a “coastal” or modern farmhouse aesthetic. It’s an excellent solution for damaged or mismatched wood.
However, if the wainscoting is high-quality original hardwood (like oak or cherry) in a historic home, painting it can significantly decrease the home’s character and resale value.
If the wood is unremarkable or makes the room feel like a dark cave, go for the white—just use a high-quality primer first.
Do you install wainscoting before or after cabinets?
You should almost always install wainscoting after the cabinets. Cabinets need to sit flush against the drywall for maximum stability and a seamless fit. If you install the wainscoting first, you create unnecessary gaps and awkward leveling issues.
By waiting until the cabinets are in, you can “dead-end” the wainscoting into the cabinet sides or trim, resulting in a much cleaner, custom-integrated look that handles the transitions between wood and cabinetry far more gracefully.
Do you paint the wainscoting and trim the same sheen?
Yes, it is standard practice to use the same sheen for both. Traditionally, a semi-gloss or satin finish is used because these surfaces are high-traffic and prone to scuffs.
Matching the sheen ensures the wainscoting, baseboards, and chair rails look like one cohesive architectural element rather than disjointed pieces.
If you want a more modern, moody vibe, you can use a matte finish, but ensure both the trim and panels match to maintain that seamless, intentional flow.
The bottom line
Deciding whether to paint wainscoting before or after installation ultimately comes down to a trade-off between initial convenience and final precision.
The pre-paint approach is a lifesaver for your back and your floors. Painting panels on sawhorses allows for a factory-smooth finish without the risk of drips on your baseboards. It’s the go-to choice if you’re working with a bold color that would be a nightmare to “cut in” against a white wall.
If you’re a perfectionist who can’t stand visible nail holes or slightly gapped seams, painting after installation is the way to go. It allows you to caulk every joint and fill every fastener hole, resulting in a seamless, built-in look that feels like a permanent part of the architecture.
In most cases, a hybrid method—priming and applying a first coat before installation, followed by a final finish coat once the wood is on the wall—offers the best of both worlds. It minimizes the mess while ensuring a flawless, professional result.
Share the post "Painting Wainscoting – Before or After Installation"

When you put up new drywall, it may seem that all you need to do is add two coats of Read more

Estimating the amount of paint you will need to paint your house is not rocket science. But it can be Read more

To dry appropriately, paint uses four components; Additives, Binder, Filler, and Solvent. The effectiveness of all four will depend on Read more

Painting your house is always a big deal, with lots of questions and decisions to work on. Though every house Read more

Jack Luis is a semi-retired painter who loved painting his clients’ ideas on their walls.
He had worked as a painter for over a decade serving customers in areas such as Charleston, Mount Pleasant, Beaufort, and Georgetown, SC (South Carolina). Today in his free time, he likes to read and write about the newer techniques implemented in his profession. You may read more about him here or get in touch with him here.