
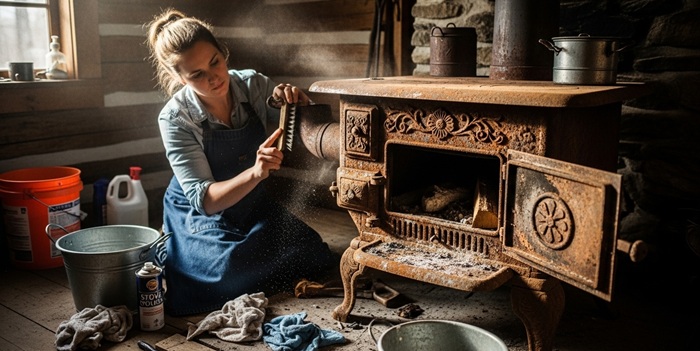
A wood stove is more than a heating appliance. It’s a centerpiece. A statement. A workhorse that quietly keeps your home warm through winter storms and chilly mornings.
But when rust starts creeping across its surface, that rugged charm quickly turns into an eyesore—and worse, a structural concern.
The good news is that the rust doesn’t mean your stove is doomed.
In most cases, removing rust from a wood stove is a manageable DIY project if you catch it early and use the right techniques.
With some patience, the proper tools, and a bit of elbow grease, you can restore your stove’s appearance, protect its longevity, and keep it performing at peak efficiency. So, let’s get into it…
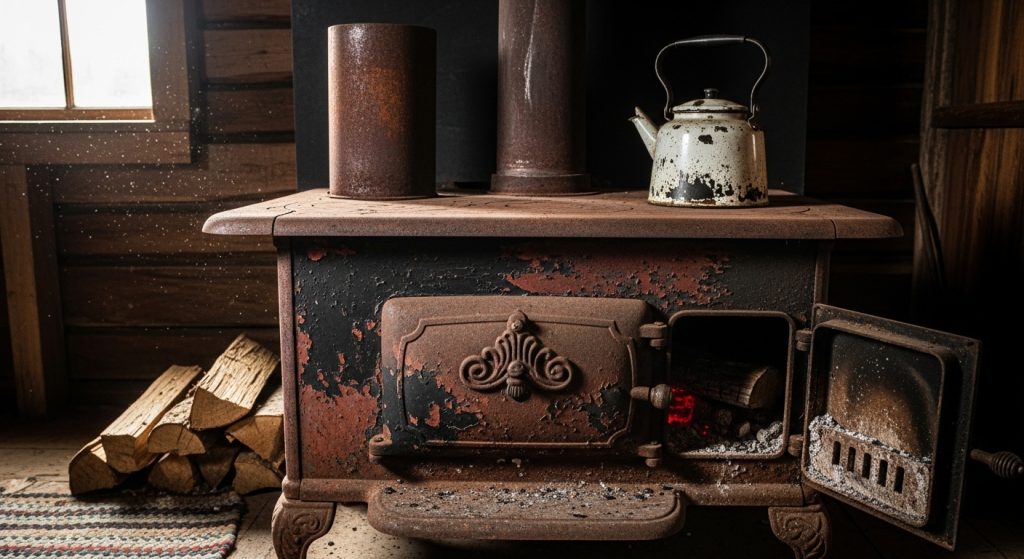
What Causes a Wood Stove to Rust?
Rust forms when iron or steel reacts with oxygen and moisture—a chemical process known as oxidation. Since most wood stoves are made from cast iron or steel, they’re naturally vulnerable.
Common causes include:
- High humidity in basements or cabins
- Moisture exposure during summer months
- Condensation inside the firebox
- Poor ventilation or improper storage
- Wet wood storage near the stove
Even temperature swings can cause condensation to form on metal surfaces. That thin film of moisture is enough to trigger oxidation.
Left untreated, surface rust can develop into pitting, flaking, and structural weakening. That’s why timely intervention matters.
7 Methods to Get Rust off a Wood Stove
Below are seven proven techniques, ranked from mild household solutions to more aggressive restoration approaches.
1. White Vinegar Treatment
White vinegar is an effective and affordable solution for treating light surface rust.
It contains acetic acid, which reacts with iron oxide and gradually dissolves the rust without harming the solid metal underneath.
Simply spray undiluted white vinegar on the rusted area and allow it to sit long enough (30–60 minutes) to break down the oxidation.
After treatment, rinse or wipe the surface clean and dry it immediately to prevent flash rusting from forming again.
2. Natural Lemon and Salt Method
For light, cosmetic rust, a natural lemon and salt treatment can be an effective and non-toxic option.
The citric acid in lemon juice reacts with rust, helping to loosen and break down surface corrosion.
To use this method, sprinkle a layer of salt over the rusted area, then squeeze fresh lemon juice on top until the surface is fully saturated.
Allow the mixture to sit for two to three hours so it can penetrate the rust. Afterward, scrub the area gently and wipe it clean.
Although this method works more slowly than vinegar, it remains a safe and environmentally friendly alternative for minor rust spots.
3. Baking Soda Paste
Baking soda is a gentle yet effective solution for treating mild rust spots. Its mildly abrasive texture helps lift surface corrosion, while its alkaline nature works to neutralize rust.
To use this method, mix baking soda with a small amount of water to form a thick paste. Apply the paste generously to the rusted areas and allow it to sit for one to two hours so it can penetrate the corrosion.
Afterward, scrub the area gently with a soft brush or sponge, then wipe the surface clean and dry it thoroughly.
This method works particularly well for small patches and quick touch-ups.
4. Steel Wool or Wire Brushing
When rust buildup becomes more noticeable, mechanical removal is often the fastest and most effective solution.
Using fine-grade steel wool (#000 or #0000), a wire brush, or medium-grit sandpaper (120–220 grit), you can physically scrub away loose rust and corrosion.
To remove rust with a wire brush and steel wool, work steadily until the rust flakes are completely removed and the surface feels smooth.
Afterward, vacuum any debris and wipe the area with mineral spirits to remove remaining dust and residue.
To finish, apply a coat of high-temperature stove paint to protect the metal and restore its appearance. This approach forms the foundation of most wood-burning stove rust treatment routines.
5. Commercial Rust Removers
For more severe rust buildup, a commercial rust remover designed specifically for metal appliances can be highly effective.
Look for products that are phosphoric acid–based and labeled as stove-safe formulations.
These solutions work by converting rust into a stable, paintable compound, making it easier to restore and protect the surface afterward.
Always follow the manufacturer’s instructions carefully and ensure the area is well ventilated during application.
Avoid products marketed as general rust removers for wood, as those are formulated for stained lumber and are not suitable for cast iron or metal stove surfaces.
*Last update on 2026-03-30 / Affiliate links / Images from Amazon Product Advertising API
6. Sanding and Repainting
When rust is extensive, or the goal is to restore your stove’s appearance completely, sanding and repainting is the gold standard solution.
Begin by removing all loose rust with a wire brush, then sand the entire surface evenly to create a smooth, uniform base.
Once sanding is complete, wipe the surface thoroughly with acetone or mineral spirits to remove dust, grease, and residue.
Apply a high-temperature stove paint rated for 1200°F or higher, ensuring even coverage. Finally, cure the paint according to the manufacturer’s instructions to properly set the finish.
This method not only eliminates existing rust but also creates a protective barrier that helps prevent future corrosion while giving your wood stove a refreshed, like-new appearance.
7. Electrolysis (Advanced DIY Option)
For heavily rusted stove components that can be removed—such as grates, doors, or internal parts—electrolysis is an extremely effective restoration method.
This process uses electrical current in a washing soda solution to separate rust from the metal surface without grinding away solid material.
To perform electrolysis, you’ll need a plastic container large enough to submerge the part, a battery charger, washing soda (sodium carbonate), and a sacrificial steel anode.
While the setup is more technical than other rust-removal methods, it produces impressive results and preserves the integrity of the metal.
If you’re comfortable with DIY automotive repairs or restoration projects, electrolysis can deliver professional-level results for severe rust buildup.
| Method | Best For | Difficulty | Cost | Risk Level |
|---|---|---|---|---|
| White Vinegar | Light surface rust | Easy | Low | Low |
| Lemon + Salt | Cosmetic rust | Easy | Low | Very Low |
| Baking Soda | Small patches | Easy | Very Low | Very Low |
| Steel Wool | Moderate rust | Moderate | Low | Low |
| Commercial Remover | Heavy rust | Moderate | Medium | Medium |
| Sanding + Paint | Widespread rust | Moderate | Medium | Low |
| Electrolysis | Severe removable parts | Advanced | Medium | Medium |
Understanding Rust Formation on a Wood Stove
To fix rust effectively, it helps to understand what’s happening at a microscopic level.
When iron (Fe) reacts with oxygen (O₂) and water (H₂O), it forms iron oxide (Fe₂O₃). Unlike iron, iron oxide is porous and flaky. This allows moisture and oxygen to penetrate deeper, accelerating corrosion.
The three stages of rust on a stove include:
- Surface Rust – Light orange discoloration, cosmetic damage only
- Scaling Rust – Flaking metal, texture becomes rough
- Pitting Rust – Small holes form, compromising metal thickness
Wood stoves often experience surface rust during the off-season. If caught early, restoration is straightforward. If the rust has progressed to deep pitting, professional repair or part replacement may be necessary.
Understanding this progression helps determine which removal method is appropriate.
Safety Precautions When Cleaning a Rusty Gas Stove
Whether you’re cleaning a wood stove or dealing with a rusty gas stove or gas burners, safety should always come first.
- Before starting any restoration work, ensure the stove is completely cool.
- If it’s a gas stove, disconnect the gas supply. Proper ventilation is also essential, especially when working indoors.
- Always wear gloves and eye protection, and use a dust mask when sanding rusted areas.
- Avoid using harsh chemicals without adequate airflow, and never use flammable cleaners near heat sources.
Once you’ve finished removing rust from stove top surfaces or other metal areas, prevention becomes your next priority. Keeping humidity levels below 50% helps prevent future corrosion.
Using a dehumidifier during humid months, storing dry firewood away from the stove, and covering the chimney to reduce moisture entry can all make a significant difference.
Applying stove polish annually and burning a small fire occasionally during the off-season also helps maintain a protective layer and reduce moisture buildup.
Consistent preventive care ensures long-term success in eliminating rust.

How to Assess the Extent of Rust Damage on a Wood Stove?
Before starting any repair work on your wood stove, it’s important to carefully assess how serious the rust damage is.
A proper evaluation helps you decide whether it’s a simple DIY fix or something that requires professional attention.
| Step | What to Do | What to Look For |
|---|---|---|
| 1: Visual Inspection | Examine the stove closely under good lighting. | • Orange or brown patches • Flaking or bubbling paint • Rough or scaly texture • Visible pitting |
| 2: Touch Test | Run a gloved hand lightly over the affected surface to determine the damage. | • Smooth but discolored • Rough and flaky • Deep pits |
| 3: Structural Check | Inspect critical areas carefully. | • Seams and joints • Door edges • Flue collar • Legs or base |
Be aware that if the surface feels smooth but appears discolored, it is likely just surface rust and usually easy to treat.
If it feels rough and flaky to the touch, that indicates moderate corrosion that may require more thorough cleaning and refinishing.
However, if you notice deep pits in the metal, this suggests advanced damage, which may need more extensive repair or professional attention.
Consider replacement if:
- Pitting exceeds 1/8 inch depth
- Structural seams are compromised or cracks form in cast iron
For most homeowners, rust issues are limited to surface corrosion, which can usually be treated successfully with DIY methods. However, if rust has weakened load-bearing parts, consult a professional before proceeding.
Rust vs Burn Marks: Know the Difference
Many homeowners confuse rust with heat damage. So, it’s also important to correctly identify what you’re dealing with.
Rust typically appears flaky and orange-brown, while burn marks are blackened heat stains caused by high temperatures.
Issues such as burn marks require different techniques than treating corrosion.
If you’re trying to remove burn stains from a stove, stove grates, or cooktop, focus on degreasers and polishing products rather than rust removers.
Knowing the difference prevents wasted time and effort and ensures you use the right method for the problem.
Related FAQs
Is rust inside the firebox dangerous?
Light surface rust inside the firebox is generally not dangerous. It commonly forms during the off-season when humidity and condensation accumulate inside the stove. Once you start burning fires again, much of that light oxidation will burn off or stabilize.
However, deep pitting, flaking metal, or structural thinning can weaken the stove body over time. If rust has compromised welds, seams, or cast iron panels, it should be professionally inspected to ensure safe operation and proper heat containment.
Can WD-40 remove rust from a wood stove?
WD-40 can help loosen light surface rust because it penetrates oxidation and displaces moisture. It works best when combined with steel wool or a wire brush for gentle scrubbing.
However, it’s not a permanent rust solution. WD-40 does not convert or fully eliminate corrosion—it simply helps lift it. After cleaning, you should wipe the surface thoroughly and apply high-temperature stove paint or protective coating to prevent rust from returning.
Can I use regular paint after removing rust from the wood stove?
No, regular household paint should never be used on a wood stove. Standard paint cannot withstand the extreme temperatures a stove reaches and will blister, peel, or emit harmful fumes when heated.
Always use high-temperature stove paint rated for at least 1,200°F (or as recommended by the manufacturer). These specialty coatings are formulated to handle repeated heating cycles and protect the metal from future corrosion while maintaining a durable, heat-resistant finish.
The Bottom Line
Rust happens. Especially with hardworking cast iron appliances exposed to fluctuating temperatures and seasonal humidity.
The key is early action.
Whether you choose vinegar, sanding, or a full refinishing project, the process of restoring your stove can be surprisingly satisfying. With the right tools and a systematic approach, achieving a durable, protected finish is entirely possible.
More importantly, maintenance transforms your stove from a neglected winter relic into a dependable, long-lasting investment.
Because at the end of the day, a well-maintained wood stove doesn’t just heat your home—it anchors it. And keeping it rust-free? That’s simply good stewardship.
Share the post "7 DIY Ways to Remove Rust from a Wood Stove"

One of the greatest feelings in the world is finishing a project. Whether it be remodeling part of your house Read more

Old & Empty Paint Cans We see continuous development around the globe all the time. Due to this, you can Read more

Repainting your cabinets is a great way to give your kitchen a fresh, newer look. However, there is a deceptive Read more

Painting your home can be a great relaxation and fun for DIYers. Yes, it's wonderful - until you spill some Read more

Jack Luis is a semi-retired painter who loved painting his clients’ ideas on their walls.
He had worked as a painter for over a decade serving customers in areas such as Charleston, Mount Pleasant, Beaufort, and Georgetown, SC (South Carolina). Today in his free time, he likes to read and write about the newer techniques implemented in his profession. You may read more about him here or get in touch with him here.