

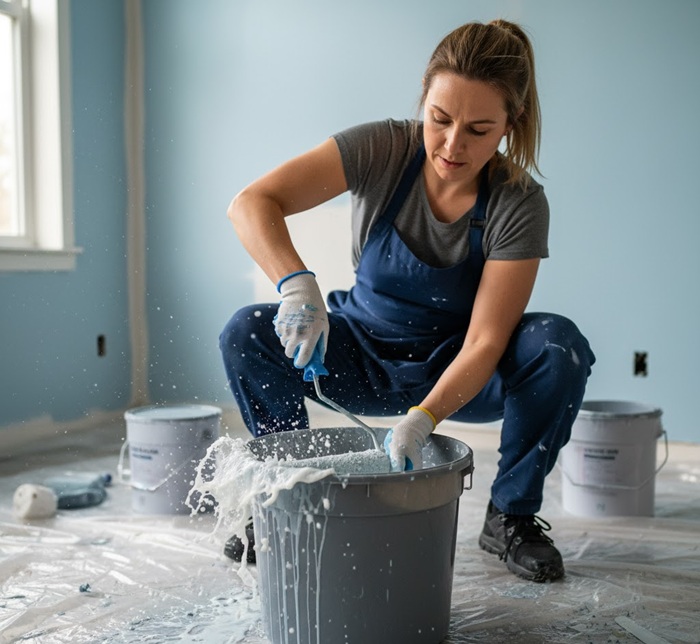
Working with paint rollers and trays can become so messy that cleaning up is something you’d rather avoid.
However, leaving dried paint in your equipment can lead to poor paint application, clogged rollers, and a big cleanup headache down the line.
So, you might be tempted to simply buy inexpensive disposable paint rollers and plastic trays with the intention of discarding them after use.
But believe me, this is a big mistake – you should never compromise quality for convenience. This means it’s always good to use top-quality paint rollers, trays, and other tools so that they can be cleaned and reused for the upcoming paint season.
But what’s the right approach to extend the life of your paint roller and trays? What’s the exact cleanup process look like?
In this guide, I’ll walk you through the steps that can help you wash and store your painting rollers/trays safely so they’re ready to use again whenever you need them.
Know the Paint Type on Roller Before Cleanup
Before you dunk your used roller into anything, take 10 seconds to identify what type of paint you’re dealing with.
This tiny bit of detective work decides whether your cleanup session will be a peaceful rinse with warm, soapy water… or a full hazmat-level operation involving mineral spirits and a disposable container.
Choose wrong, and you might end up destroying your roller cover, gumming up the fibers, or worse—leaving behind residue that sabotages the finish on your next project.
Latex (water-based) paint
If you’ve worked with latex paint or other water-based options like emulsion, acrylic, chalk paint, etc., congratulations—cleanup will be the easy part.
Warm water + dish soap = done.
It will be fast-drying, forgiving, and will not demand any chemical solvents. A few squeezes, a rinse, and your roller is ready for round two.
Oil-based paint
Oil-based paint, however, plays by different rules. It won’t budge with water and needs a solvent like mineral spirits or paint thinner to dissolve the binders.
This means:
- Proper ventilation
- Adequate safety measures
- Responsible waste disposal
- And yes, a sacrificial container you won’t cry about throwing away
But once you use the right solvent, it restores your roller (and other tools) beautifully and prevents hardened paint from ruining your gear.
Washing the Paint Roller After Using Water-Based Paint
Proper cleaning and reuse of paint rollers and trays is a smart way to be both sustainable and cost-conscious when tackling your home painting needs.
Personally, I have found that I can successfully reuse my paint rollers 3-4 times, as long as I clean them properly after each use.
So, if you are keen enough to wash your tools to reuse them for a future project, here are all the instructions you will need to follow:
Step 1 – Gather your tools and materials
Cleaning your paint roller and tray after the project is completed requires using proper tools and materials. Most of these can easily be found at home or bought from the store cheaply.
For washing water-based paints, these items include: a bucket, a firm-bristle brush, a putty knife, dishwashing liquid soap, newspaper, rags, a plastic bag, and warm water.
After you have had all your cleaning items ready, you can proceed with the cleaning steps.
Step 2: Drain out leftover paint into the can
After you paint your walls, don’t waste leftover paint in the tray because it can still be used for future projects.
Lean the paint tray against a wall to allow it to drain into the paint can. This not only saves paint but also makes the paint tray much easier to clean.
Put the lid on the paint can, and mark it with a small dollop of paint to show the color of the paint inside. Also, put a label to show what type of paint it is and in which room the paint was used, so that you can quickly identify it among other paint cans in your storage.
Step 3: Scrape and recapture excess paint
Remember that cleaning a paint roller is different than cleaning a paintbrush because you need to clear away all the excess latex paint it holds rather than wasting the paint.
Using a putty knife or a roller squeegee tool, scrape off the excess paint from the roller back into the paint can. Scrape off using long strokes, and be careful not to drop dried bits of paint into the paint bucket.
And while you’re at it, don’t forget the roller tray (whether plastic or metal); give it a quick scrape too, so leftover paint doesn’t harden into it, which you’ll need to fight with later.
Remember, rollers hold more excess paint, and you may not get them all off just by scraping. So, to remove that excess paint, roll more of it on a sheet of newspaper or cardboard until it stops releasing paint.
Step 4: Remove the roller cover
The next move is to remove the roller cover from the frame—gently.
No twisting, yanking, or wrestling it off like it owes you money. A smooth slide protects both the cover and the frame, which you’ll clean separately later.
A smooth removal also keeps the inner cardboard core from tearing and prevents the metal frame from bending out of shape.
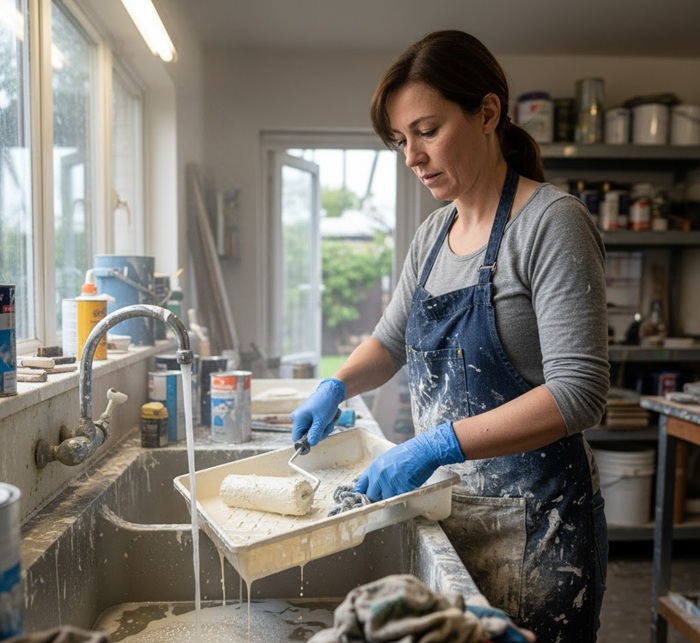
Step 5: Wash the roller cover and tray
With the cover freed, it’s time for its mini spa session.
Soak your roller cover, frame, and tray in a bucket of warm water with just a few drops of dish soap.
Remember that too much soap only makes the rinsing stage feel like laundry day, so keep it minimal. Use your hands to massage the paint out of the fibers of the cover, frame, and tray.
Step 6: Rinse them nicely
Next, rinse all your tools thoroughly in clean water (a second bucket works perfectly if you have it).
Keep going until the water runs clear. Then give it a quick shake to get rid of extra moisture—just be aware of your surroundings unless you want to redecorate the walls.
Step 7: Let them dry
Finally, let the roller cover, frame, and tray dry the right way.
For the roller cover, stand it upright or slide it over a hanger so the nap can stay fluffy, round, and ready for its next project. Airflow all around the cover is key, so allow the fibers to breathe back into shape.
The frame and tray should also be set out to air-dry completely. A damp frame can rust over time, and a wet tray becomes a magnet for dust and debris that will end up in your paint later.
Whatever you do, don’t lay the roller cover flat. That’s a rookie move—it crushes the nap, distorts the shape, and pretty much guarantees streaky, uneven application during your next paint job.
Cleaning the Paint Roller and Tray After Using Oil-Based Paint
Unlike water-based paints (that are relatively easy to clean), oil-based paints like enamel, varnishes, or finishing oils you should deal with them differently.
For the process, the items you will need include: two buckets, a firm-bristle brush or wire brush, paint brush comb (or painter’s comb), putty knife, rubber gloves, eye protection, paint thinner or mineral spirits, newspaper, rags, plastic bag, and warm water.
Step 1: Scrape off excess paint
Before you go anywhere near solvents, remove as much paint as possible.
Use a putty knife or roller squeegee to scrape the roller cover and tray back into the paint can.
The less paint you’re cleaning later, the better—your solvent will last longer, and your hands will thank you.
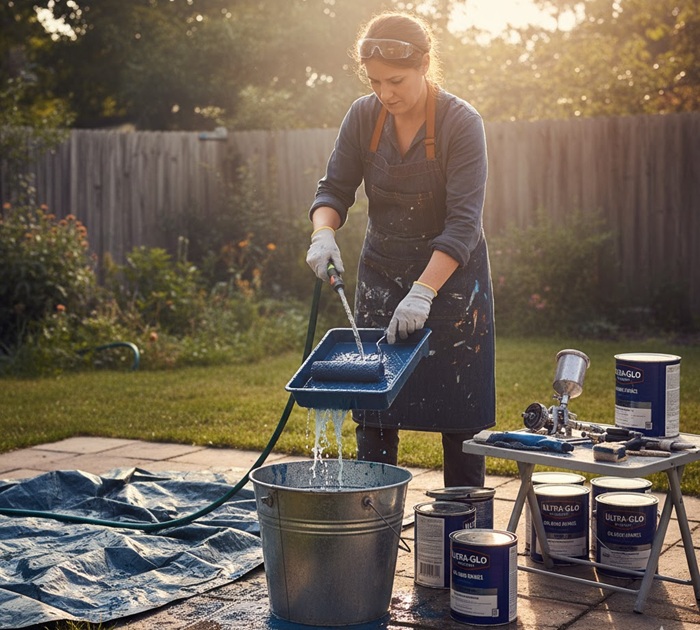
Step 2: Set up a solvent-safe station
Oil-based paint cleanup is not a kitchen-sink job. Work outdoors or in a well-ventilated space.
Grab a disposable metal or plastic container (one you won’t mind sacrificing) and pour in enough mineral spirits or paint thinner to fully submerge the roller cover.
Step 3: Soak the roller cover
Drop the roller cover into the container and let it soak for a few minutes.
Swirl it around gently to help the solvents break down the oils and resins. Gloves are non-negotiable here—mineral spirits aren’t hand lotion.
Step 4: Massage out the paint
Once softened, squeeze and massage the roller cover under the solvent. You’ll see the paint release quickly.
Avoid aggressive twisting, which can break the internal core. Think “firm persuasion,” not “choking the roller to death.”
Step 5: Clean the roller frame
Dip a cloth into the same solvent and wipe down the roller frame, especially the metal wire.
Any dried oil paint left behind will cause drag the next time you roll, and rust doesn’t play nicely with your finish.
Step 6: Wash the roller tray
Pour some mineral spirits directly into the tray and use a brush, rag, or newspaper to dislodge the remaining paint.
Swish, wipe, and repeat until it’s clean. If there’s a lot of residue, switch to fresh solvent instead of fighting with dirty, paint-loaded spirits.
If needed, use a firm wire brush to work the thinner around the paint tray. Also, use a putty knife to scrape off hard-to-remove paint that has already dried up on the pan.
Step 7: Dry everything properly and dispose
After wiping off the solvent, set the roller cover upright to dry, let the frame air out completely, and place the tray in a dust-free spot.
Solvent takes time to evaporate—so patience is part of the process. Once fully dry, your tools are ready for their next oil-based adventure.
Pour the used mineral spirits into a clearly labeled, disposable container.
Once sealed, follow your local Ann Arbor disposal rules to get rid of the spent solvent safely and legally.
Tips and warnings when you have a septic tank
When you’re on a septic tank, the biggest rule of paint cleanup is simple: nothing paint-related goes down the drain.
Whether it’s latex or oil-based paint, even small amounts can harm the bacteria your septic system depends on.
To protect your septic system, it’s wiser to:
- Wipe off as much paint as possible from the roller using paper towels or cardboard.
- Wash your paint roller, grid, trays, and other tools in a bucket of warm, soapy water (with mineral spirits) outdoors.
- Let the paint solids settle, and pour the clear water or solvent onto the gravel or soil.
- Finally, toss the dried sludge in the trash.
TIP: Never wash rollers used with oil-based paint in the sink. Oil paints require mineral spirits or thinner, and those chemicals should never enter household plumbing or septic systems.
How Do You Soften the Hardened Paint Roller After the Cleanup?
There are instances when your roller seems to be clean, but still, you can’t use it.
The problem is generally due to the stiffness of the roller, which doesn’t allow you to paint correctly. Or, sometimes it can be due to the dried paint on the roller, which was allowed to remain on the tool for weeks without a cleanup.
Fortunately, there are a few easy fixes to save a dried, stiffened, and hardened paint roller.
Method 1- Fabric softener
To use this softening method, you will require a fabric softener, a scraper, and a bucket filled with water.
- Take the scraper and scrape off all the traces of residual paint particles you might see on your sponge roller cover.
- In a bucket, fill 2 gallons of water and mix a cup of fabric softener. Stir the liquid well.
- Allow the paint roller to sit in the bucket, and stir it around for a minute or two.
- Finally, rinse your paint roller thoroughly with warm water and let it dry.
While washing and softening your paint roller, make sure you try to do it gently while being cautious so you don’t cut in the roller cover.
Method 2- Vinegar + heat
If you have used oil-based paint before, you may need to use something stronger to soften a paint roller cover.
- After the paint cleanup, soak the roller cover in white vinegar for at least one to two hours.
- Heat the vinegar and roller cover in a pot on the stove until simmering. Avoid breathing the vinegar fumes when heating.
- Scrape and comb the bits of softened paint (that may have remained) out of the nap with a stiff brush or 5-in-1 tool.
- Wash thoroughly with warm, soapy water and rinse until the water runs clear.
- Repeat the process if necessary and air-dry the roller completely before its next use.
Method 3- Acetone or mineral spirits
If your roller has tackled oil-based paint before and still feels stiff or stubborn, you may need to bring out a stronger ally—acetone or mineral spirits.
It cuts through hardened oils or tough, dried paint more aggressively and can help soften a roller cover that’s on the verge of retirement.
Just remember, these solvents work fast, so use them sparingly, wear gloves, and treat it as a last-resort rescue mission.
Here are quick steps to soften a paint roller cover using acetone:
- Submerge the roller in a metal or glass container of acetone.
- Soak for 15-30 minutes, or longer.
- Scrub the softened nap using a stiff brush.
- Wash the roller thoroughly with warm, soapy water to eliminate acetone residue.
- Rinse with clean water, shake out the excess, and air dry completely before the next use.

A Few Other Quick Clean-up Techniques for Paint Rollers and Trays
Besides the above, there are a few other methods and tools that can be used for washing your paint roller and cover. These include…
1- Roller washer
A roller washer or roller cleaner tool is an easy-to-use device that can help reduce the time spent on cleaning your tool simply by hand.
This works by attaching a hose to a faucet in your home. You will then need to slide the roller cover into the roller washer’s tube. Turning on the water will automatically flush out the paint within a few minutes.
2- Pressure washer
If you are painting your exteriors, like your decking area or walls, using a pressure washer can be a quick way to clean up the paint roller and trays.
Simply attach the roller to a long pole and make it stand against a wall or a wheelbarrow. Then, using a pressure washer, spray off the roller. You will find it cleaned off within a minute or two.
3- Washing machine
To clean the roller in a washing machine, simply remove it from the roller cage and put the roller sleeve into your machine set on a cool wash mode.
Once cleaned, allow the roller sleeve to dry naturally. If you want, you can also use a roller spinner or a clean old towel to dry it quickly. Just stuff the towel edges into the damp roller and roll it up in the towel.
4- Roller drill attachment cleaning device
One of the best and easiest ways to clean a paint roller is by using a roller cleaner tool (like Roller Ready) that comes with a drill attachment.
Although most of the roller spinners are for cleaning work by a hand pump action, there are few that attach to your standard cordless power drill.
With this kind of attachment (available in materials like plastic and aluminum), you can use a variable-speed drill to remove the excess paint from your roller. The good thing is that by using this drill attachment tool, you can quickly clean and store paint rollers for reuse in the future.

How to Know if The Roller Sleeve is Worn Out and You Should Replace It?
Generally, you will find your roller sleeve leaving a more textured look (rather than a smooth, clean coating) when you have used it about 4-5 times.
At times, you will also notice that your roller “slides” instead of “roll” when you are painting the walls or ceiling. Ideally, this is the confirmation that will tell you that your paint roller is worn out, and it’s time to replace it with a new one.
Additionally, you can also check for these signs for verification to replace the roller sleeve…
- The clogged paint roller is not getting cleaned perfectly.
- It takes enough time to clean the roller cover.
- Some paint and dullness remain after the cleanup.
How to make your paint roller and tray last longer?
Remember, a high-quality paint roller may last up to 5 cycles before it gets completely damaged and unusable. But how many times you can reuse your tool will largely depend on the quality of the sleeve cover, how you use it, and how you wash it after every use.
So, here are a few tips for you to make your paint roller last longer and keep the trays clean and reusable.
a) Take a small break
If you’re painting your entire home, taking short breaks isn’t just good for your body—it’s surprisingly good for your roller nap too.
There’s a bit of science (and common sense) behind it: when you’re tired, you tend to press harder, roll faster, and generally treat your tools like they’re the reason you’re exhausted.
That extra pressure can crush the nap, wear it out faster, and leave uneven paint behind. But when you step away and return after a proper break, you approach the roller with a fresh mind and a lighter hand, keeping the fibers soft, springy, and ready to deliver a smooth, consistent finish.
b) Do not use a paint tray with dried paint in it
Even if the paint has dried rock-solid on the tray, those brittle flakes are just waiting for the perfect moment to break off and hitch a ride on your roller.
Once that happens, they’ll embed themselves into your foam roller sleeve, tearing the surface or creating unwanted texture.
Worse, those tiny paint crumbs can transfer straight onto your walls—leaving bumps, streaks, and headaches you’ll have to scrape or sand off later. A clean tray isn’t optional; it’s the difference between a smooth finish and a frustrating repair job.
c) Store the tools correctly if you want to reuse them
Keep in mind that cleaning your roller and tray is only half the battle—storing them properly is what actually determines how long they’ll stay in good, paint-worthy shape.
Most rollers and trays can easily be reused 3–5 times (often more), but only if you keep them from drying out, attracting dust, or getting crushed between projects.
- Once your roller is cleaned and fully dried, wrap it in an airtight layer—plastic wrap, a zip-top bag, or even a grocery bag tightly sealed around the ends works fine.
- If you know you’ll be using it again within a week, pop the wrapped roller into the fridge. The cold slows down drying and keeps the nap soft and ready for action.
- If you won’t be painting again anytime soon, skip the fridge and store the wrapped roller in a cool, dry spot where dust, moisture, and curious hands can’t reach it.
When it’s time for reuse, moisten the roller with some water before you apply the paint. This will allow the roller cover to soak enough paint.
FAQs about cleaning paint rollers and trays
Is it cheaper to wash paint rollers or throw them away?
For most DIY and home projects, washing paint rollers is almost always cheaper than throwing them away—especially if you use them for multiple projects.
With proper cleaning and storage, you can make the cost per use much lower than buying a new one each time.
The only exceptions are extremely cheap foam rollers or rollers used with stubborn oil-based paints, where the time and solvent cost may outweigh the benefit.
How to clean a Teflon-coated paint tray without damage?
To clean a Teflon-coated paint tray without damage, focus on gentle methods and avoid abrasives.
For wet paint, immediately scrape excess paint into the can, then wash the tray with warm, soapy water and a soft sponge.
For dried paint, fill the tray with hot, soapy water and let it soak overnight to soften the paint, then gently scrub with a non-abrasive brush or sponge. Always rinse thoroughly and dry completely after washing.
Never use metal scrapers, steel wool, or harsh chemicals, as these will ruin the non-stick surface.
What is the fastest way to dry a paint roller cover sleeve after cleanup?
The fastest and least messy way to dry a paint roller cover after cleanup is to spin out as much water as possible and then stand it upright with full airflow around it.
After rinsing, shake the roller vigorously to remove excess water, then place it on a roller spinner (manual or drill-powered) if you have one—this can remove almost all remaining moisture in seconds.
Finally, stand the cover vertically on its end or slide it over a dowel or hanger so air can circulate inside and out.
The Bottom Line
While it might be tempting to toss rollers after a long project, cleaning, storing, and reusing them is almost always the more economical choice.
A well-cleaned, well-dried roller holds its shape, keeps its nap fluffy, and lays down paint far more smoothly on the next job. The same goes for trays: a clean surface means no dried flakes, no bumps, and no surprises on your freshly painted walls.
With a little care, your tools can easily handle multiple rounds of painting, saving you money and delivering consistently clean, even finishes every time.
Share the post "How to Wash a Paint Roller and Tray? (The Right Way)"

One of the greatest feelings in the world is finishing a project. Whether it be remodeling part of your house Read more

Old & Empty Paint Cans We see continuous development around the globe all the time. Due to this, you can Read more

Repainting your cabinets is a great way to give your kitchen a fresh, newer look. However, there is a deceptive Read more

Painting your home can be a great relaxation and fun for DIYers. Yes, it's wonderful - until you spill some Read more

Jack Luis is a semi-retired painter who loved painting his clients’ ideas on their walls.
He had worked as a painter for over a decade serving customers in areas such as Charleston, Mount Pleasant, Beaufort, and Georgetown, SC (South Carolina). Today in his free time, he likes to read and write about the newer techniques implemented in his profession. You may read more about him here or get in touch with him here.