

If you’ve been struggling to get paint off metal in or around your home, don’t despair. While it may seem tricky—or even downright impossible, to sand paint off metal is actually quite easy once you know what you are doing.
In this guide, we’ll go over a few ways you can easily sand the paint off metal objects in your home, garage, or industry. By following the information here, you should be equipped to get paint off metal in any situation.
Best Ways to Sand Paint Off Metal
No matter whether you are sanding metal to paint it fresh or need to sand off the old peeling paint from your metal before spray painting, it’s important to follow the procedure so that you end up with a job well done.
Some of the most efficient ways that can be tried out include;
1- Sanding Block
If you’re not ready to throw out money for fancy equipment, you can start by sanding paint off metalwork in an old-fashioned way.
Sanding blocks require a bit of effort, but they can effectively sand any paint off metal, especially if it’s a large area like metal entry doors, steel garage doors, cars, metal fence, etc.
If you choose to use this method, keep in mind that it could take a bit of time for you to remove all the bits of paint.
To start, purchase a quality sanding block. These cheap tools are handheld and need to be covered with a sheet of sandpaper before use.
Start by applying a sheet of 80-grit paper to the block and sanding down your metal to remove the paint.
You may find it easier to go up and down with your motion, but you could just as easily sand in a circular pattern. The choice is up to you, but remember that your piece of metal will begin to acquire marks in the direction of your sanding.
Once you’ve sanded off most of the primer or paint from metal work, switch the paper on your sanding block to the 200-grit variety. This is because 200-grit is much softer and won’t dig into the surface of the metal as fiercely.
If you use only 80-grit paper, you will risk ruining the quality of the metal as you get closer and closer to removing the paint.
After you are done with most sanding, remove the sandpaper from the block and use it to get to the smaller and harder-to-reach spots if you find some corners or crevices left.
To finish the job, take a piece of steel wool and rub it in a circular motion across the metal or stainless steel surface. While this helps to give the metal a smooth look, in some cases, you may not find it necessary to do so.
Sandpaper Grit Guide for Preparing Metal Before Painting
| Step / Purpose | Recommended Grit | Notes |
|---|---|---|
| Initial Paint Removal | 80-grit (Coarse) | Leaves visible scratch marks; avoid using coarse grit too long or too aggressively to prevent metal damage. |
| Smoothing After Paint Removal | 200-grit (Fine) | Prevents gouging or scratching the metal as you get close to bare surface. |
| Detail Work (Corners & Crevices) | Leftover sheets from block (80–200 grit) | Tear and fold sandpaper to reach tricky edges and recessed areas. |
| Final Surface Smoothing (Optional) | Steel Wool (000 or similar) | Optional step; not always necessary but improves final paint adhesion and finish. |
2- Orbital Sander
If you don’t wish to do it all by hand using a sand block, an orbital sander can make your life a lot easier.
The rules of using an orbital sander for sanding paint off metal are almost exactly the same; only it will be the machine and not you putting effort into the work.
After fixing an 80-grit sheet to your paint remover sander, you’ll want to move up and down the surface of the metal.
When the paint is almost gone, switch to a sheet of 200-grit to gently coax the remaining paint off the metal’s surface.
You may need to sand a bit by hand (without a sand block). So, start by using 80-grit paper on the remaining paint, and then switch to 200-grit.
Once the paint is removed, you may choose to rub steel wool in a circular pattern to give the metal a smoother finish.
3- Use Baking Soda
If you really want to turn up the heat, try the paint removal method with baking soda. This works great for those who don’t have time to wait overnight and need to clean their metal hinges immediately.
The good news is that you’ll only need a throwaway pot, water, and baking soda for this to work.
Simply add some baking soda to the water and boil it before dropping your metal inside.
Cut the heat down to simmer and let it sit for around thirty minutes—at which time, the paint should be all but gone.
Keep in mind, however, that boiling metal and paint can send off potentially hazardous fumes, so do this only with the proper protective equipment.
4- Use a Chemical Product
If you’re looking for a more official way of removing paint from cast iron metal, consider using a chemical product designed to do just that.
Currently, there are many chemical paint removers on the market that you can use on your metal furniture (like tables and chairs) to strip the paint off. I love using USA-made Smart ‘n Easy Citrus Paint & Varnish Remover Gel because it’s free of caustic chemicals yet robust and will usually need a single no-fuss application.
If you want to try any other, just keep in mind that you’ll want to buy the remover specifically designed for the type of metal you’re using. This will ensure safer, more efficient results.
Additionally, be aware that these chemical products may also be hazardous, so handle them safely according to the directions and with the correct equipment like gloves to protect your hands as you work.
5- Add Some Heat from Your Slow Cooker
One of the more outside-the-box methods of getting latex paint off metal is to essentially cook it off (a.k.a. the “crock-pot paint removal method”).
That’s right—but it’s not the oven that you’ll be using. It’s your slow cooker. Here’s how to use this setup:
- Create a protective barrier inside your cooker with a plastic Slow Cooker Liner
- Soak your old, painted fixtures in a slow cooker with warm water for 8-10 hours on high
- The paint will start to dissolve and peel off in 2-3 hours, but you should let them sit for at least 8 hours to get all the paint removed.
- Once all the paint is gone, rinse your brass in clean water and dry with a soft cloth.
Remember that the longer you put the items in a crockpot, the less you will need to clean them up later after soaking. So, I recommend giving them 10 hours for the best results.
Putting metal in a slow cooker on the lowest heat setting can help loosen paint from metal—so much so that you’ll find it shining after letting it sit overnight.
Make sure the lid is on and the heat setting is low, or this method might backfire on you.
Additionally, you may find that some of the metal remains are covered in paint or paint flecks. If this should occur, there’s no reason to worry.
Simply wipe your piece of metal down with a toothbrush and a cloth, and the remaining paint should quickly come up.
As you may have guessed, if you do plan on using this slow cooker for cooking and eating later, you’ll want to give it a very thorough clean.
You may choose, instead, to buy a separate slow cooker for the garage so that you don’t have to worry about potential cross-contamination.
Bonus Tip:
The above paint sanding methods are all but guaranteed to sand paint off your metal.
But in case you do not want to use sanding paper or an electric sander, you can perform the paint sanding with homemade paint removers for metal – you already have at home.
Alternatively, if the metal pieces are small, you can use sonic cleaners with simple tricks, and you can be back to having shining, like-new metal in no time – without a sander or a sanding block.
Crock-Pot Paint Removal Method – Do’s and Don’ts
The crock-pot paint removal method can be used to remove decades of thick old paint layers from metal surfaces, but be aware that this method works only for small, non-electric, heat-resistant metal items.
This means if you are using a slow cooker to remove paint from metal objects, the items must be solid metal (typically steel, brass, copper, iron, or aluminum) and free of plastic, wood, or glued components.
Here’s a clear list of metal objects that are safe and practical to strip paint from using a slow cooker:
Small Tools and Decorative Metal Items
- Utility knife blades
- Metal putty knives
- Small metal ornaments (brass/iron)
- metal toys like cars, trains, airplanes, or small figurines
- Wrenches, pliers, and hand tools without rubberized grips
- Metal hooks and drawer locks (if entirely metal and non-spring-loaded)
Vintage & Restoration Hardware or Fixtures
- Screws, bolts, nuts, and washers
- Door knobs and handles (solid metal only)
- Cabinet pulls and drawer handles
- Backplates and escutcheons
- Latches and brackets
- Old window brass hardware
- Bronze metal household
- Antique door hinges and sash locks (without plastic bushings)
- Light-fixture parts (if all-metal and not electrical parts)
What NOT to Put in a Slow Cooker?
You should never put anything in a slow cooker that contains plastic parts, rubber seals or grips, wooden components, or any electrical or mechanical internals. These materials can melt, warp, or get permanently damaged under heat.
Avoid items with springs as well—they can rust, weaken, or deform during the process. Anything held together with adhesives is also a bad idea, since the glue will break down and create a sticky mess.
And of course, skip oversized objects; only small metal pieces that fit comfortably inside the cooker should be used.

Does Muriatic Acid Remove the Paint from Metal Safely?
If you plan to use muriatic acid for removing paint or rust from metal surfaces, keep in mind that it’s a terrible choice for the task—especially on galvanized metal surfaces, where the acid can cause even more damage than you’d expect.
While it’s fantastic for scraping paint off stubborn surfaces like bricks and concrete, it’ll turn your metal objects into brittle versions of themselves (with a weakened or dangerously etched surface), even if you rinse them like a pro.
Muriatic acid (hydrochloric acid) might loosen a little paint here and there, but it’s highly corrosive and can seriously damage the metal surface.
The fact is, it doesn’t just target paint; it loves to attack anything it meets (organic or inorganic) in its path, including varnish, fabrics, plastics, and yes, even the metal you’re trying to preserve.
If you still decide to use muriatic acid for paint removal on metal, with extreme caution, always wear chemical-resistant gloves, goggles, and work in a well-ventilated outdoor area.
1- Dilute the acid: Muriatic acid must be diluted before use.
A typical mixture is 1 part acid to 10 parts water—and always add acid to water, never the other way around, to avoid dangerous reactions.
2- Apply carefully: Use a chemical-resistant brush or spray bottle to apply the diluted solution to the painted metal.
Let it sit for a few minutes so the acid can begin softening the paint layer.
3- Scrub and rinse: Once the paint loosens, scrub the surface with a stiff brush to lift away the softened coating.
Rinse the metal thoroughly with clean water to neutralize and remove all acid residue. Dry the metal immediately to prevent flash rust.
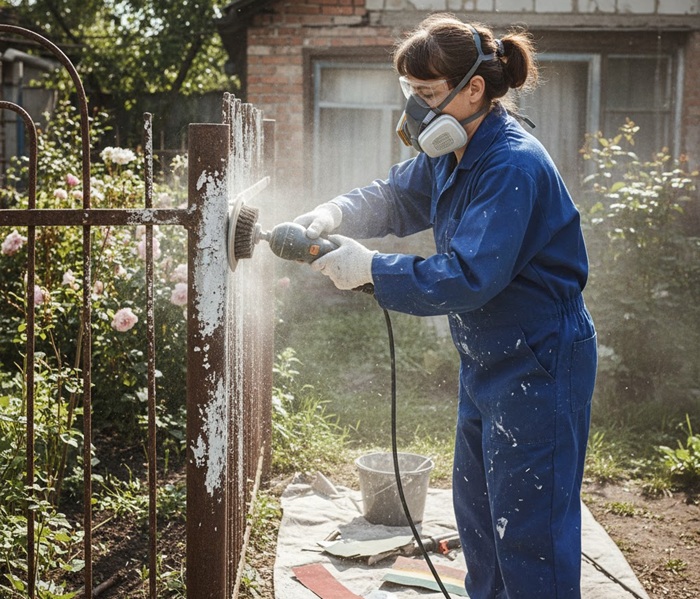
Can You Sand Paint Off of Metal Surface with a Power Drill?
Using a power drill to strip coatings from metal is not only possible but also highly effective when paired with the right attachments and technique.
It’s suitable for both small projects and moderate restoration work. You just need to attach the appropriate abrasive accessory, maintain steady pressure, and let the tool do the work for a clean, controlled, and even outcome without the fatigue of hand-sanding.
Here are a few important things to keep in mind when using this method:
1- Use for suitable projects
A power drill is versatile enough for various metal surfaces, such as old baseboard metal, metal siding, and even larger items like an aluminum boat.
The rotating abrasive action works well on flat areas and gently contoured shapes, allowing you to clear paint down to raw finish metal with minimal effort. For tight corners or recessed sections, smaller abrasive attachments provide better precision.
2- Choose the right attachments
A standard bit won’t remove paint—you’ll need sanding discs, flap wheels, nylon abrasive brushes, or surface-conditioning pads. These accessories are designed to cut through paint layers efficiently while maintaining consistent surface contact.
Flap wheels are especially useful for curved or uneven areas, while abrasive nylon brushes are ideal for delicate surfaces. Selecting the best drill bit for the job ensures faster material removal and a more uniform result.
3- Surface preparation, repair, followed by final finishing
After most of the paint is removed, switch to finer-grit discs to level out the surface and reduce scratch marks.
This step is critical if you plan on repainting or refinishing. Once bare metal is exposed, inspect for dents, corrosion, or pinholes. Fill any imperfections with a reliable metal filler for holes to ensure structural and visual uniformity before priming.
Once the surface is cleaned, repaired, and smoothed, you can apply a compatible metal primer followed by your chosen topcoat.
Whether you’re aiming for industrial durability or a polished finish like chrome spray paint, proper surface preparation ensures strong adhesion and long-lasting results.
Related FAQs:
Can you sandblast acrylic paint off a metal surface?
Yes, you can sandblast acrylic paint off a metal surface, and it’s one of the fastest ways to clear stubborn coatings. Sandblasting strips the layers aggressively, even if you’re dealing with thicker or wet gloss paint.
It works well on durable metals and large areas, leaving a clean, textured surface ready for priming. However, it’s not ideal for thin or delicate metals, as the abrasion can cause warping or pitting if the pressure is too high.
What’s the best way to sand rust off old metal pipes?
The best way to sand rust off old metal pipes is to start with 80-grit sandpaper or emery cloth to cut through heavy rust, then switch to 120–220-grit to smooth the surface.
For faster removal, use a drill with a wire wheel or abrasive brush, which conforms well to round pipes. After sanding, wipe the metal clean with mineral spirits and apply a rust-inhibiting primer immediately to prevent new corrosion.
Can you scrape paint off a metal surface at home with hand sanitizer?
You can use hand sanitizer to remove water-based, acrylic, or latex paint from metal, but it’s not the most efficient method. It works slowly, softening the paint rather than fully stripping it, and is best suited for small spots or light residue.
For larger areas, thicker coatings, or oil-based paints, dedicated paint strippers or stronger household products will deliver far better and faster results.
The Bottom Line
Cleaning paint off your metal no longer has to be a nightmare. By trying one of the five steps above, you can be on your way to the paint-free metal in no time. You can try these ideas to prep and sand the metal for painting or between the two coats of paint on the metal surface.
Just don’t use acids like muriatic or phosphoric acid on metals for paint removal. It’s like inviting a wrecking ball to a delicate paint-removal job leading to corrosion, rust, or deterioration—best keep it away from your metal treasures.
Share the post "How to Sand Paint Off Metal? (The Right Way)"

Your basement is the perfect spot for building rooms you may not want in the main house. These may include Read more

Drywall is basically a panel composed of calcium sulfate dihydrate or gypsum. Other names include plasterboard, wallboard, sheetrock, gypsum board, Read more

Repainting the wooden window frames of your house is like putting on a nice, new summer dress after a long, Read more

While brushes and rollers are the traditional means of painting walls, spray paint is coming more in favor. For many Read more

Jack Luis is a semi-retired painter who loved painting his clients’ ideas on their walls.
He had worked as a painter for over a decade serving customers in areas such as Charleston, Mount Pleasant, Beaufort, and Georgetown, SC (South Carolina). Today in his free time, he likes to read and write about the newer techniques implemented in his profession. You may read more about him here or get in touch with him here.