
Porcelain isn’t just found in the obvious places like floors, walls, and countertops. It extends to bathroom sinks, toilets, decorative items, vases, figurines, dinnerware, and even fireplace surrounds.
Its water resistance, stain resistance, low maintenance, and ability to mimic materials like wood, stone, or marble make it a favorite. But these very properties make achieving lasting paint adhesion tricky.
Understanding why porcelain behaves the way it does is crucial if you want your painting project to succeed.
This guide dives deep into everything you need to know about painting porcelain, including the five best paints for different applications, detailed techniques for application, potential failure cases, and maintenance tips to ensure your newly painted porcelain continues to look stunning for years.
Can You Paint Over Porcelain?
Porcelain is incredibly durable and resistant to water, stains, and wear, but this also makes it very difficult for paint to stick.
Essentially, painting porcelain is like trying to glue something to glass: it requires the right materials, proper surface prep, and realistic expectations.
While it’s widely used in flooring, wall tiles, sinks, tubs, toilets, and decorative items, its dense, non-porous, often glazed surface resists most conventional paints. So, the success of the project depends on chemical adhesion rather than mechanical grip.
Even when using specialized paints, the failure often comes down to improper preparation. If the surface is not cleaned, sanded, and primed correctly, the paint cannot bond chemically, and micro-lift occurs over time.
Additionally, applying paint in thick coats can trap solvents, leading to bubbling or uneven curing.
Environmental conditions like high humidity or extreme temperatures can also affect the paint’s ability to adhere properly and cure fully.
5 Types of Paint to Use on Porcelain
Not all porcelain surfaces are created equal. A floor tile will have different demands than a sink or decorative figurine, and choosing the correct paint type is critical.
Below, we explore the five most effective paint types for porcelain, their chemistry, and why they succeed where others fail.
1. Two-Part Epoxy Paint (Best for Sinks, Tubs, and Toilets)
Two-part epoxy paint is the professional standard for high-use porcelain surfaces like sinks, bathtubs, and toilets.
The chemistry behind epoxy involves a resin and a hardener that react chemically to form a rigid, cross-linked polymer.
This reaction creates an extremely durable coating that bonds to the glaze at a molecular level, providing long-lasting protection against water, chemicals, and abrasion.
One of the key advantages of epoxy is its chemical adhesion. Unlike latex or standard acrylic paints that rely mainly on mechanical adhesion (gripping onto surface imperfections), epoxy chemically interacts with the surface, creating a much stronger bond.
This makes it ideal for surfaces that are exposed to water or frequent cleaning.
However, epoxy can be unforgiving. It has a short working time, emits strong fumes, and requires precise mixing ratios.
Improper application can lead to yellowing, bubbling, or uneven surfaces. Despite these challenges, when done correctly, epoxy offers durability that can rival factory finishes.
2. Acrylic Enamel Paint (Best for Walls and Low-Impact Tiles)
Acrylic enamel paints are formulated to create a hard, glossy finish that adheres well to smooth, glazed surfaces.
The polymer base allows the paint to level beautifully, reducing brush marks and providing a near-professional finish.
The inclusion of adhesion promoters in enamel acrylics helps the paint stick to surfaces that would normally repel it.
This type of paint works well on vertical surfaces like wall tiles, backsplashes, or fireplace surrounds where moisture exposure is moderate, and abrasion is minimal. Its water resistance and moderate durability make it a practical option for decorative applications.
However, it’s not suitable for heavy traffic floors or high-use sinks because repeated cleaning and friction can cause wear over time.
Acrylic enamel is easier to apply than epoxy, with more forgiving cure times, making it accessible for skilled DIYers.
3. Urethane-Reinforced Paint (Best for Porcelain Flooring)
Porcelain floors present unique challenges. They require a paint that can withstand heavy foot traffic, abrasion, and occasional moisture exposure without cracking or peeling.
Urethane-reinforced paints combine the toughness of polyurethane with the adhesion properties needed for slick, glazed surfaces.
The urethane component provides flexibility, allowing the paint to expand and contract slightly with temperature changes and daily wear, preventing cracking or chipping.
Application requires meticulous preparation, including cleaning, sanding, and priming, to ensure adhesion. The curing time can be longer than other paints, but the resulting surface can handle heavy use while maintaining its appearance.
If floors are not properly prepared or the paint is applied too thickly, common failures include peeling at edges, cracking, or scuff marks that penetrate the coating. Proper technique and patience are critical for success.
4. Oil-Based Enamel Paint (Best for Decorative and Accent Pieces)
Oil-based enamels are slower-drying paints that level into smooth, glossy finishes ideal for decorative porcelain pieces.
The chemistry of oil-based paints allows them to flow and self-level, minimizing brush marks and creating a polished, elegant appearance.
The slow drying time facilitates a better bond to the porcelain surface, especially when paired with a compatible primer.
This type of paint works well on decorative items like vases, figurines, or accent pieces that do not undergo heavy handling. They offer excellent adhesion and durability for low-stress applications.
The limitations include long drying times, strong odors, and unsuitability for food-contact surfaces. Over-application or skipping priming can result in drips, pooling, or uneven finish, particularly on vertical or curved surfaces.
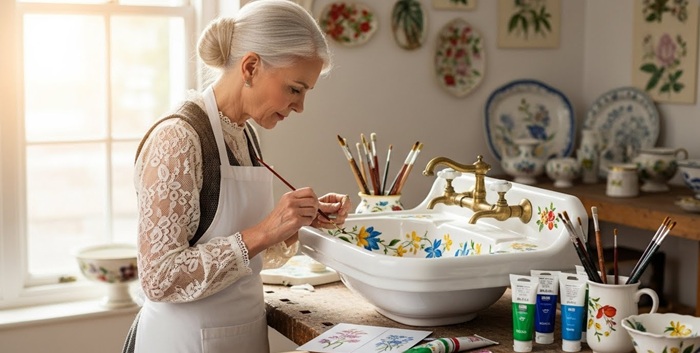
5. Specialty Ceramic & Porcelain Paint (Best for DIY Projects)
For small craft projects, touch-ups, or decorative tiles, specialty ceramic and porcelain paints are designed for ease of use and chemical compatibility with non-porous surfaces.
These paints often include adhesion promoters and are formulated to withstand mild cleaning, though they are not intended for high-stress applications like floors or sinks.
They are perfect for DIY enthusiasts who want to personalize tiles, pottery, or decorative porcelain items without complex preparation.
Their ease of use is balanced by lower durability; these paints can chip or wear if used in high-traffic or moisture-prone areas. Even for crafts, following recommended surface preparation significantly improves longevity and finish quality.
| Porcelain Surface | Recommended Paint Type | Durability |
|---|---|---|
| Bathroom sink / tub | Two-part epoxy | Very high |
| Wall tiles / backsplash | Acrylic enamel | Medium–high |
| Porcelain flooring | Urethane-reinforced paint | High |
| Decorative items | Oil-based enamel | Medium |
| DIY crafts / accents | Specialty ceramic paint | Low–Medium |

Paint Application Tips and Techniques for Porcelain
Successful porcelain painting is a careful balance of preparation, technique, and patience. Skipping steps or rushing the process can lead to premature paint failure.
Cleaning is the absolute first step. Even if a surface looks spotless, invisible residues from oils, waxes, soaps, and cleaning chemicals can prevent paint adhesion.
Use a strong degreaser or an alkaline cleaner to remove any contaminants.
After cleaning, de-gloss the surface by sanding or chemical means. This creates micro-abrasions that give paint a place to grip.
This step is crucial; without it, chemical adhesion alone may not be sufficient.
Once de-glossed, the surface must be thoroughly rinsed and dried. Any leftover dust, residue, or moisture can create bubbles, fisheyes, or peeling.
Priming and painting come next. Use primers specifically formulated for porcelain or glazed surfaces. These primers act as a chemical bridge between the slick porcelain and the paint layer.
When applying paint, thin, even coats are essential. Thick coats can trap solvents, causing bubbling or uneven curing. Multiple thin coats allow the paint to build gradually and bond more effectively.
Drying and curing times must be respected—“dry to the touch” is not the same as fully cured. Environmental factors like humidity, temperature, and ventilation also influence curing and adhesion.
Even with proper preparation and application, failures can occur if steps are skipped.
Common issues include peeling at edges, cracking due to thermal expansion, bubbling from trapped moisture, or chipping under mechanical stress.
Understanding these potential failures and addressing them proactively increases the likelihood of a long-lasting, professional-looking finish.

Do You Need to Seal the Porcelain Surface After Painting?
While it’s not essential, sealing your porcelain sink with an acrylic topcoat is one investment that will reward you for years to come.
A clear sealer top coat will not only protect your paint from wear and tear but also from stains, hard water minerals, and other contaminants from penetrating the porcelain.
When deciding how to apply the sealer, you must choose between a convenient spray gun or an accurate paintbrush. The former will speed up your job, but the latter can provide more control over specific application areas.
After you have applied the sealer and it has dried for a couple of hours, ensure its bond with your sink by creating a small pool of water and letting it sit in the basin for at least 8 hours.
If it is still intact after that time, you are good to go.
However, if any water manages to seep through and change the color of the surface, wait several days for the sink to completely dry off. Then reapply two additional coats of sealant.
Tips for Protecting and Maintaining the Painted Porcelain Surface
A painted porcelain surface is only as resilient as the care it receives.
This means once you have chosen the right spray paint for your porcelain surface (enamel, acrylic, or epoxy) and applied it correctly, ongoing maintenance becomes essential to preserve its finish, color, and durability.
To keep it looking pristine, follow these guidelines:
1- Choose the right cleaners: Avoid abrasive scrubbers, harsh chemicals, or strong alkaline detergents that can dull or etch the paint. Use mild, pH-neutral cleaners or porcelain-safe solutions to lift dirt gently.
2- Allow full curing: For sinks, tubs, or floor tiles, let the paint cure completely before heavy use. Proper curing ensures strong adhesion, hardness, and longevity.
3- Protect high-traffic areas: Use felt pads, rubber mats, or soft overlays in areas prone to scratches or impact. This is especially important for horizontal surfaces or decorative pieces.
4- Address minor damage immediately: Small chips or hairline cracks can allow moisture to seep beneath the paint, causing flaking or staining. Prompt touch-ups prevent bigger problems.
5- Consider a protective topcoat: Transparent topcoats with scratch-resistant polymers or UV inhibitors add an extra layer of defense against wear, sunlight, and moisture.
6- Maintain gently and regularly: Even the most durable paint can degrade under aggressive scrubbing, heavy impacts, or extreme temperature changes. Regular, careful maintenance keeps surfaces vibrant.
7- Choose the top brand for follow-up finishes: When it’s time to recoat or refinish your old dull porcelain surface, consider purchasing the spray paints from only reliable brands such as Rust-Oleum, Montana, and ShangTianFeng. If possible, look for rust-resistant and UV-stable finishes specifically marked for ceramic/porcelain/glass adhesion.
The Bottom Line
Porcelain may be durable, but it’s not untouchable. Modern paint chemistry, combined with meticulous preparation and careful application, allows homeowners and DIY enthusiasts to transform porcelain surfaces without replacing them.
However, success depends on matching the correct paint type to the specific porcelain application, respecting curing times, and protecting the finished surface.
By combining careful cleaning, proactive repairs, and strategic protection, your painted porcelain surfaces can remain elegant, vibrant, and long-lasting—a small investment in care for years of aesthetic payoff.
Share the post "5 Best Paints to Use on Porcelain"

With Radon warnings and sealers out there, it can send your head into a spin about whether this is all Read more

We all love MDF for our various projects, including furniture and cabinets. After all, it's cost-effective compared to other wood Read more

For those who want their walls to have a unique appearance, glow-in-the-dark paint is one way to express creativity. As Read more

For over two hundred years, the Valspar brand has been associated with quality. Starting in 1806, the company grew into Read more

Jack Luis is a semi-retired painter who loved painting his clients’ ideas on their walls.
He had worked as a painter for over a decade serving customers in areas such as Charleston, Mount Pleasant, Beaufort, and Georgetown, SC (South Carolina). Today in his free time, he likes to read and write about the newer techniques implemented in his profession. You may read more about him here or get in touch with him here.