

Getting spray paint on your favorite glass mirror is never desirable.
But if you’ve ever repainted a room, finished an art project, or simply walked past a paint tray at the wrong time, you already know the heartbreak: your once-perfect mirror now looks like a modern art piece you never asked for.
In this guide, I will break down five highly effective methods for removing dried paint from glass, plus aftercare tips, professional-help indicators, FAQs, and everything in between.
Ready? Let’s bring your mirror back to its clear, flattering glory.
5 Methods for Removing the Paint from Mirror
Whether it’s a few specks or entire streaks of old dried paint, removing it from glass isn’t difficult—if you use the right approach.
Below are five proven, safe, and technically correct methods anyone can use at home.
Each method is tested on standard mirrors, tinted windows, glass light fixtures, and glass window panes, which all react similarly to paint removal attempts.
| Method | Best For |
|---|---|
| Warm Water + Dish Soap | Fresh splatters, light paint residue, latex/water-based paint, and gentle cleaning without chemicals. |
| Razor Blade Scraper | Thick or stubborn dried paint, hardened overspray, large patches of dried paint on flat mirror surfaces. |
| Rubbing Alcohol / Acetone | Oil-based paint, enamel spots, nail polish, small but tough paint marks that need chemical softening. |
| Commercial Paint Remover / Stripper | Multi-layered paint, very old dried paint, heavy enamel, spray paint that other methods can’t loosen. |
| Vinegar + Heat DIY Method | Mild to moderately dried paint, eco-friendly cleaning, households avoiding harsh chemicals, repeated light spills. |
Method 1: Warm Water + Dish Soap
This is the gentlest, most beginner-friendly method—ideal when the paint isn’t overly stubborn.
This DIY paint stripping technique is best suited if you need to clean light, fresh, or thin paint spots on the glass.
What you need:
- Warm water
- Dish soap
- Microfiber cloth
- Non-abrasive scrub sponge
- Spray bottle
Steps to follow:
1. Prepare a Cleaning Mix – Fill a spray bottle with warm water and add a small amount of dish soap, keeping roughly a 1:4 soap-to-water ratio.
This creates a smooth, lubricating solution that helps loosen paint without leaving residue. Shake gently to combine, but avoid creating too many bubbles—they reduce cleaning efficiency.
2. Soak the Paint Spot – Spray the solution generously over the paint splatter.
Ensure the entire spot is visibly wet so the moisture can work its way under the dried layer. Allow the area to sit for 5–10 minutes, giving the mixture time to soften acrylic, latex, or water-based paint.
3. Scrub Gently – Use a non-abrasive sponge to work on the softened paint. Apply light pressure and short strokes—let the solution do most of the work.
Stay away from scouring pads, scrub brushes, or anything abrasive, as these can scratch the surface or harm the reflective backing of the mirror.
4. Repeat if Necessary – If the paint is still clinging on, don’t force it.
Simply spray another coat of the warm soapy mix and repeat the scrubbing process. Stubborn spots sometimes need two or three soaking cycles to break down fully.
5. Wipe Clean – Once the paint is removed, wipe the area with a clean microfiber cloth.
This prevents lint, streaks, and haziness that paper towels often leave behind, giving you a smooth, clear finish instead of a streaky mirror.
Method 2: Razor Blade Scraper
This is the old-school favorite—and still one of the most effective for removing thick, stubborn paint from old mirror surfaces. But you must use proper technique to avoid scratches.
What you need:
- A steady hand
- Single-edge razor blade or glass scraper
- Water or glass cleaner
- Gloves
Steps to follow:
1. Wet the Surface Thoroughly – Before the blade touches the glass, saturate the mirror with a generous layer of glass cleaner or soapy water. This creates a lubricating barrier that allows the blade to glide without friction.
Never scrape dry glass, as this is the quickest way to cause visible scratches, surface scuffs, or small chips.
2. Hold the Blade at a 30° Angle – Proper angle control is the key to safe scraping. So, keep the blade of your scraper tilted at about 30 degrees relative to the mirror surface.
- Too steep, and the blade digs into the glass.
- Too flat, and you’ll simply skate over the paint.
A consistent angle ensures the edge lifts the paint without biting into the mirror.
3. Scrape Slowly in One Direction – Use slow, controlled strokes—either downward or sideways.
Avoid sawing back and forth, as this increases the risk of scratching and can cause paint fragments to drag across the surface. You’re shaving the paint off, not chiseling it.
4. Re-wet Often – Every few strokes, stop and spray the area again.
A wet, slippery surface keeps the blade moving smoothly and prevents micro-abrasions. If the glass starts to dry, you’re seconds away from causing damage.
5. Wipe Clean – After the paint is removed, wipe the mirror and frame with a clean microfiber cloth to eliminate loosened paint particles, moisture, and any streaks. This finishes the job with a clean, polished surface.
Warning and tips:
Avoid using this method on the following surfaces, as a razor blade can cause permanent damage:
- Decorative mirrors with beveling – Edges chip easily.
- Anti-fog mirrors – The coating can be scratched or peeled.
- Tinted film – The blade will lift or tear the film instantly.

Method 3: Rubbing Alcohol or Acetone
Oil-based paint bonds aggressively to glass. So, it’s essential that you use solvents like acetone or isopropyl alcohol to dissolve these paints on your mirror chemically rather than mechanically.
What you need:
- 70–99% isopropyl alcohol or acetone
- Cotton balls
- Gloves
- Ventilation
- Microfiber cloth
Steps to follow:
1. Prepare Your Solvent Carefully – Choose 70–99% isopropyl alcohol or pure acetone (not nail polish remover with conditioners).
Wear gloves and open a window—these solvents evaporate quickly, but their fumes can build up fast. Soak a cotton ball, pad, or microfiber corner with the solvent until fully saturated.
2. Apply Directly to the Dried Paint – Press the solvent-soaked cotton firmly onto the dried paint. Hold it in place for 2–3 minutes.
This soaking time allows the solvent to penetrate the paint’s polymer structure, weakening the bond between the paint and the glass.
3. Rub in Controlled Circular Motions – Once the paint softens, rub gently using circular motions.
You’ll notice the paint beginning to smear or fade—this means it’s breaking down. Avoid scrubbing aggressively; solvents do the heavy lifting, not pressure.
4. Reapply as Needed – Oil-based and enamel paints often need multiple passes. If the spot re-hardens or stops lifting, apply more solvent and allow an additional soaking period.
5. Rinse and Wipe Clean – Use a clean, damp microfiber cloth to remove residue and prevent chemical haze. A final wipe with warm water ensures no solvent streaks remain.
Method 4: Commercial Paint Stripper
When nothing else works for extremely stubborn paint, you step up to the big leagues: chemical strippers.
When using this method, look for labels that mention they’re safe for glass or are promoted as the best paint stripper for glass.
What you need:
- Commercial paint remover
- Gloves + eye protection
- Plastic putty knife
- Paper towels
- Running water nearby
Steps to follow:
1. Read the Label Before Starting – Different brands vary in strength, dwell time, and application method.
Look for one labeled as safe for glass. Wear gloves, keep ventilation high, and protect nearby frame materials—especially wood or painted trim.
2. Apply a Small, Controlled Amount – Use a cotton swab, small brush, or cloth to dab the paint remover directly onto the dried paint.
Avoid spreading it across the mirror unnecessarily and keep it away from the edges where the mirror’s backing is exposed.
3. Allow It to Work (Dwell Time) – Let the stripper sit for the specified time—typically 5–15 minutes.
During this period, the paint will soften, wrinkle, bubble, or lift as the chemical breaks down its layers.
4. Lift the Paint with a Plastic Tool – Use a plastic scraper, credit card, or silicone tool to remove the softened paint.
Metal tools are risky—they can scratch the glass or chip the silvering near the edges.
5. Rinse Thoroughly and Neutralize Residue – Chemical strippers can leave behind a filmy residue that causes a dull or cloudy finish if not washed off.
Rinse with warm water, then wipe with a microfiber cloth until the mirror shines.
Extra Precaution – Never use this method on tinted windows or mirrors with any type of film—paint remover will dissolve the tint layer instantly.
Method 5: Vinegar + Heat (A Reliable DIY Method)
This is for people who prefer DIY methods and more natural solutions.
What you need:
- White vinegar
- Microwave or stovetop
- Spray bottle
- Plastic scraper
- Microfiber cloth
Steps to follow:
1. Heat the Vinegar Properly – Pour white vinegar into a microwave-safe container and heat it for 20–30 seconds.
It should be warm—not boiling. Overheating can damage spray bottles or cause burns.
2. Apply the Warm Vinegar Generously – Pour the warm vinegar into a spray bottle or dip a cloth into it.
Apply directly to the paint spots until fully saturated. The combination of heat and acidity helps break down dried latex or acrylic paint.
3. Let It Sit and Reapply Warmth – Allow the vinegar to sit for about 10 minutes.
If it cools down before softening the paint, apply another round of warm vinegar. Continuous warmth accelerates the paint-softening process.
4. Scrape Using a Plastic Tool – Once the paint starts to loosen, gently use a plastic scraper or an old credit card to lift it off.
Avoid metal scrapers—they can gouge or scratch delicate mirror surfaces.
5. Clean and Polish the Area – After removing the paint, wipe the area with a microfiber cloth dampened with plain warm water.
This removes the acidic residue and prevents a dull or streaky finish.
Bonus Tip – Vinegar works best when used on small to medium-sized paint spots rather than large layers of hardened paint.
Tips for Keeping Your Mirror Spotless After Paint Removal
Keeping your mirror crystal clear after you’ve gone through the trouble of removing dried paint is all about consistency, technique, and using the right materials.
Here are detailed tips that help prevent streaks, cloudiness, and long-term damage:
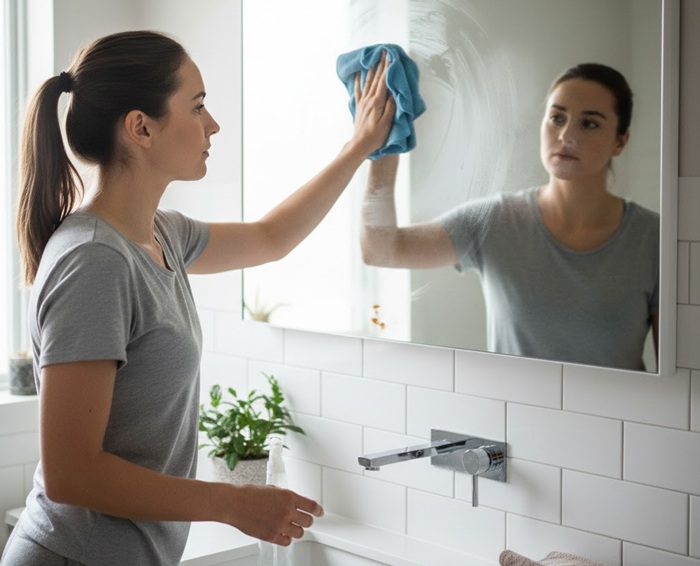
1. Use microfiber cloths — not paper towels
Microfiber cloths trap dust, moisture, and oils more effectively than paper towels, which tend to smear dirt and leave behind lint trails. Microfiber also reduces friction, lowering the risk of micro-scratches that make a mirror look hazy over time.
2. Clean using the s-pattern (not circles)
Professional window cleaners never wipe in circles. Instead, they use the S-pattern—smooth horizontal strokes from top to bottom. This prevents swirl marks, covers more surface area evenly, and reduces the chance of a streaky finish.
3. Avoid spraying cleaner directly on the mirror
Spraying directly on the mirror seems easier, but the excess liquid often runs into the mirror’s edges. Over time, moisture seeps behind the reflective layer and corrodes the silvering, creating dark blotches.
Solution: Spray your cleaner onto the cloth instead.
4. Keep ammonia away from the mirror edges
Ammonia-based cleaners are excellent at cutting grease and fingerprints, but they can degrade the mirror’s edge backing. This leads to “black edge rot,” a common but irreversible mirror problem.
Use ammonia sparingly—or better yet, switch to alcohol-based cleaners.
5. Dust and degrease monthly
Dust, humidity, and residue from hairspray or skincare products can build up over time, making mirrors look cloudy. A quick monthly wipe with a diluted alcohol solution (50% alcohol, 50% water) keeps the surface pristine.
6. Protect the mirror during future painting
Prevention is always cheaper than repair. Whether you’re repainting a room or doing small DIY projects:
- Tape the perimeter with painter’s tape
- Cover the entire mirror with plastic or kraft paper
- Move paint trays and rollers away from mirror surfaces
- Avoid open spraying near mirrors or glass
This simple preparation saves hours of cleaning and reduces the risk of damage.
7. Maintain good bathroom ventilation
If the mirror is in the bathroom, consistent humidity can cause streaks and mineral buildup. Use the exhaust fan, especially during showers, and dry the mirror afterward to keep mineral deposits from forming.
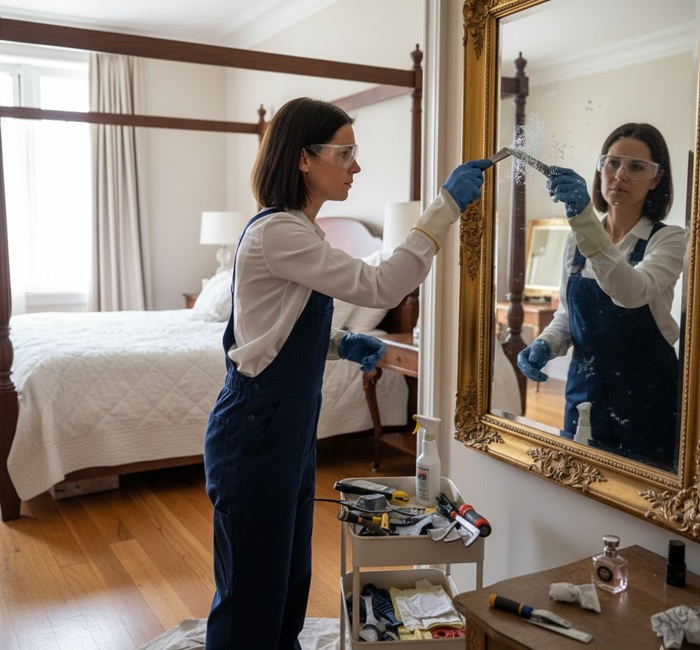
When Do You Need to Get the Help of Window Cleaning Pros?
Remember that most paint mishaps can be cleaned up with DIY methods, but some situations call for professional intervention.
Here’s when calling a window cleaning or glass restoration expert is the smartest move—not just the safest one.
1. When you have specialty or coated mirrors
Mirrors today come with various coatings—anti-fog, anti-glare, tint films, protective films, and decorative finishes. Scrapers, solvents, or harsh cleaners can easily ruin these coatings.
Professionals know how to identify coatings and use safe, non-damaging techniques.
2. When you see scratches or chips after scraping
Even tiny scratches caused by razor blades or abrasive pads can make your mirror permanently cloudy. Pros can use glass polishing systems, cerium oxide pads, and specialty machines to restore clarity and gloss.
3. When the paint is extremely thick or multi-layered
Multiple layers of spray paint, enamel, or oil-based paint require precision chemical methods. Doing this yourself risks:
- Etching the surface
- Stripping the backing
- Causing chemical streaks
Professionals can remove thick paint layers cleanly without guessing.
4. When the mirror is large or hard to reach
Tall wall-mounted mirrors, mirrored closets, and bathroom mirrors above sinks are difficult—and sometimes dangerous—to work on. Pros come equipped with extension poles, ladders, safety gear, and stabilizing tools.
5. When you’re dealing with old homes or lead-based paint
If your home predates the late 1970s, dried paint near the mirror might contain lead, which requires certified handling and disposal. Professionals trained in lead-safe practices can deal with this safely.
6. When diy attempts aren’t working
If you’ve tried 2–3 methods and the paint is still clinging on, it’s time to stop before damaging the glass. Pros have industrial-grade solvents, steam systems, and polishing tools not available in typical households.
7. When the mirror has film, tint, or laminated layers
Removing paint from tinted windows, safety glass, film-coated mirrors, or laminated fixtures is almost never a DIY job. These surfaces peel or bubble extremely easily when exposed to chemicals or scraping.
Let a professional handle it to avoid costly damage.
The Bottom Liine
Removing dried paint from your mirror doesn’t have to be a frustrating battle. With the right tools and methods—and a little patience—you can restore your mirror to pristine, crystal-clear condition without risking scratches or chemical damage.
Start with the gentlest technique and move your way up only if the paint refuses to budge. Whether you’re dealing with a tiny paint fleck or a full-blown spill, the five methods above cover every scenario, from quick DIY fixes to heavy-duty solutions for stubborn paint.
Remember: always protect your mirror before painting, keep the right tools on hand, and avoid shortcuts that might damage glass or leave you with a permanently streaky mirror.
If you ever feel unsure—especially with specialty or tinted mirrors—calling a pro is safer and often cheaper than replacing a damaged mirror.
Your mirror deserves to reflect you—not your paint mistakes. With these techniques, you’ll have it shining again in no time.
Share the post "5 Easy Ways to Remove Dried Paint from Glass Mirror"

One of the greatest feelings in the world is finishing a project. Whether it be remodeling part of your house Read more

Old & Empty Paint Cans We see continuous development around the globe all the time. Due to this, you can Read more

Repainting your cabinets is a great way to give your kitchen a fresh, newer look. However, there is a deceptive Read more

Painting your home can be a great relaxation and fun for DIYers. Yes, it's wonderful - until you spill some Read more

Jack Luis is a semi-retired painter who loved painting his clients’ ideas on their walls.
He had worked as a painter for over a decade serving customers in areas such as Charleston, Mount Pleasant, Beaufort, and Georgetown, SC (South Carolina). Today in his free time, he likes to read and write about the newer techniques implemented in his profession. You may read more about him here or get in touch with him here.