

Cable spools – you’ve undoubtedly seen them numerous times and thought they looked fascinating, if not amusing.
Despite the fact that they aren’t as versatile as wooden pallets, they may be recycled and resurrected in many different applications, like making coffee tables, side tables, garden benches, etc.
I’ve had a chance to own one of these exciting pieces of industrial cable spools for five years now.
I bought one wooden spool from the roadside at a dirt-low price and haven’t considered converting it into something useful for quite some time. It lay unnoticed in my garage for months, gathering a whole lot of dust and dirt that I used to remove once a year when we cleaned up for Christmas.
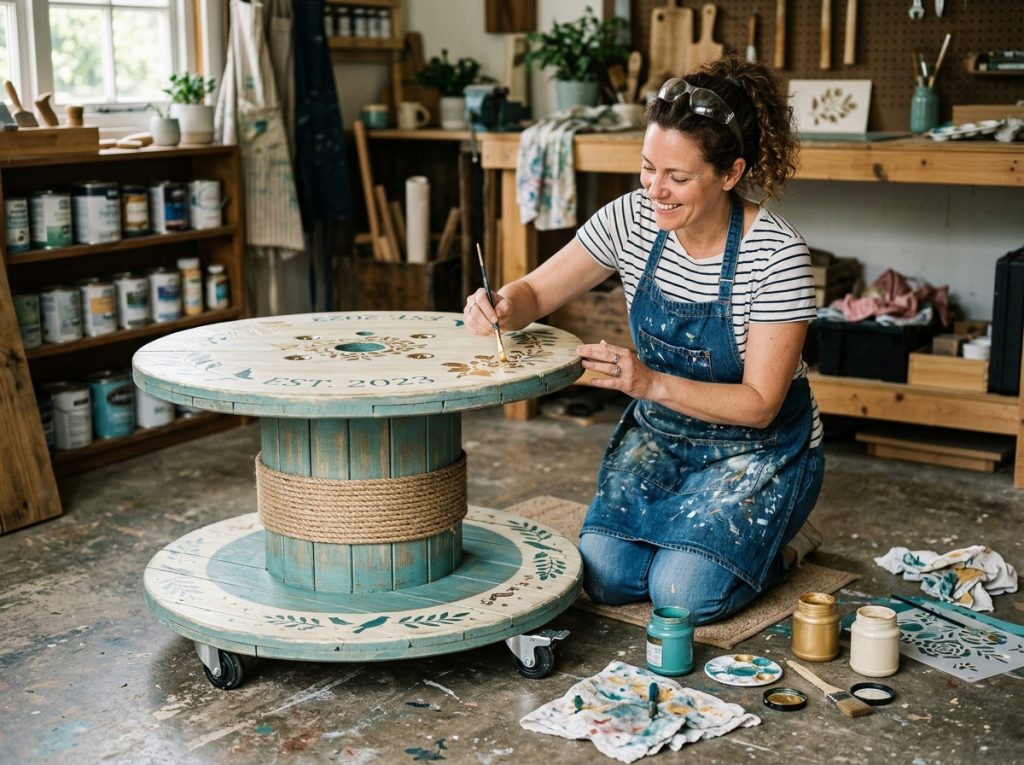
Only recently, I got the idea to recycle it. So, I finished it with milk paint, and it looks so darn new and good.
Here in this blog post, I will show you how I did it and give some useful insights to get a great-looking coffee table from an old cable spool.
If you’re thinking of making a coffee table or side table from a cable spool at an extremely low price, here you will find some brilliant ideas to get you started.
But before I start, let me tell you why you should use a wooden spool for your DIY table in the first place.
Why Use a Cable Spool Coffee Table?
First of all, making a DIY coffee table out of a cable spool is very simple – because its shape and design will do all the work. You merely need to pick the symmetrical circular pieces together and refinish them a bit.
The circle within the middle gap may be customized, covered, or used for books, indoor plants, candles, or decorations, depending on your preference.
And without spending huge amounts of money on the project, you could have an exclusive piece of furniture in your home in no time.
Below you can find a fantastic video tutorial where they tell you how to build an outdoor table out of a discarded wooden cable coil spool.
The legs of the table are made of an old sewing machine. If you want, you can keep the original part as it is to make the project super easy.
How to Finish a Vintage Wooden Spool Table?
Once we have learned why and how to make a spool table, let us see how we can prepare and finish it to look better.
The steps I have shared here are what I followed. If you want, you can tweak some and do it your way. So, let’s get to the tutorial part here.
Step 1. Start by preparing the cable spool
I started by checking for any sharp objects, screws, nuts, or nails that might be sticking out of the wood.
There were a few staples, but they weren’t too bad. I removed some of them and have left the others that were not very harmful.
Then, I compared which face end would be more appealing for the tabletop – they usually aren’t identical.
One face end had an industrial stamping, a company logo, and some stickers, so I chose that to be on the top and decided not to sand it.
Actually, it also helped me save lots of time if I were to remove all of those.
On the other end, along with the rest of the spool, I decided to sand down to make the surface smooth.
I wanted a rustic appearance and a more antiqued look, so I used only fine-grit sandpaper to roughen it up to accept the paint well.
Step 2. Choose the finish for cable spool table
It’s always best to pick the right finish for the wood before you start painting or staining it.
For my projects, I always take some time to think and decide what kind of look I’m going for with the project and where the piece will be placed.
This time I needed a natural wood distressed look with a bit of color. So, I chose to finish it with Milk Paint.
When you want to give your wood item a professional-looking finish makeover, milk paints are the go-to choice for furniture makers, designers, and DIYers because of their tremendous flexibility.
They come in a range of different color options and have the ability to produce a wide range of appearances and finishes, which is one of their greatest features.
If you want to go with the milk paint for any of your wood furniture projects, I recommend getting a convenient sample bundle of various colors because it’s available at a bulk discounted price and will help you choose the right color for your project.
If you do not want to use milk paint, you can go with other options like chalk paint, enamel paint, latex paint, or even a natural wood stain with extremely low VOCs.
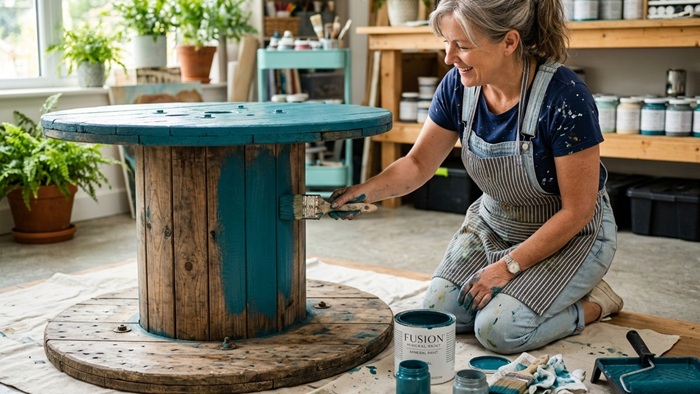
Step 3. Apply the paint to your wooden spool table
Once you have chosen the paint, it’s time to apply it to your wooden cable spool patio table.
Since I used milk paint, I applied one thin coat on the old raw wood with a paintbrush. I coated all the surfaces but not the top ones.
Once the first coat was dry to the touch, I added a second layer. And after the paint was completely dry, I distressed the edges with sandpaper to give it a more worn-out look.
I also distressed the wooden top a little bit by randomly sanding some spots. And finally, I placed a 15mm thick circular glass top on my table to add a layer of protection.
For me, the entire process was easy and quick. And the results I got were impressive – I am still happy with them when I see my coffee table in my living room.
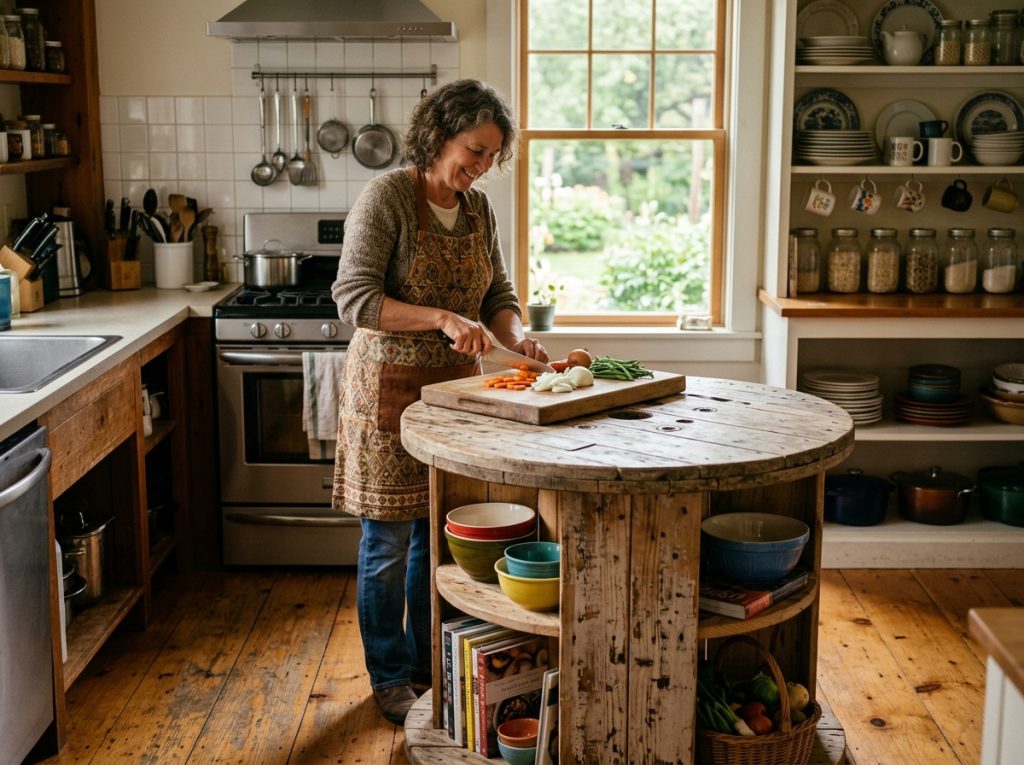
Can a Wooden Spool Be Used in the Kitchen?
A wooden cable spool can absolutely be repurposed as a kitchen island, but it requires a bit of thoughtful modification to make it truly functional.
- Standard industrial spools are designed for utility, not ergonomics, so their height often falls short of the typical kitchen island standard of around 36 inches (91 cm).
- To make it work, you may need to raise the height by adding a sturdy base, caster wheels, or adjustable legs.
- Reinforcing the top with a thicker wooden slab or a butcher-block surface can also improve durability, especially for food prep.
From a usability standpoint, a spool island can be surprisingly versatile. The central cavity offers built-in storage, which can be enhanced by adding shelves or enclosing it with plywood panels.
You can also integrate hooks or rails for hanging kitchen tools.
However, it’s important to properly sand, seal, and finish the surface with a food-safe sealant to ensure hygiene and longevity—especially if the spool was previously used in industrial settings.
If you plan to use a cable spool as a dining table, height becomes even more critical—
Standard dining tables are typically around 28–30 inches (71–76 cm) tall.
Most cable spools are either slightly taller or shorter than this range, meaning they may not provide ideal seating ergonomics with standard chairs.
If the spool is too tall, you’ll need bar stools; if too short, you may need to raise it or pair it with low seating.
In short, while a wooden spool can be creatively transformed into both a kitchen island and a dining table, it’s rarely perfect “as is.”
With a few structural adjustments and proper finishing, however, it can become a highly functional, space-saving, and conversation-worthy centerpiece in your home.
Before you bring a free or cheap wooden cable spool indoors, be cautious—
Many industrial spools are chemically treated to resist rot and pests, which can make them unsafe for home use.
Always check for markings: HT (Heat Treated) is generally safe, as it uses heat instead of chemicals, while MB (Methyl Bromide) should be strictly avoided due to its toxic pesticide properties and potential off-gassing.
If there are no stamps, assume the wood may be treated with harmful substances like lead or preservatives.
As a safety measure, sand the spool outdoors while wearing a mask, and apply a thick, high-quality sealant to encapsulate any possible contaminants before using it inside your home.
Paint vs. Stain – What’s Better for a Wooden Spool Table?
If you want to keep your spool coffee table simple, clean, and modern-looking, go with milk paint and a clear glass top, as I have.
But if you want to be on a bit of a creative side, there are endless other possibilities with upcycling, building, and decorating a coffee table with a wooden spool.
Like, you can decoupage the top or paint it with colorful acrylic paints to make a practical and fun surface for kids.
When choosing between painting and staining your wooden spool table, think about your style and how you’ll use it.
Paint gives a bold, colorful look and allows more design flexibility, while stain highlights the wood’s natural beauty with a subtler finish.
Staining generally offers better protection against moisture and sunlight, making it more durable for outdoor use, whereas paint is often easier to maintain.
Your decision should balance aesthetics, durability, maintenance needs, and where the table will be placed.
You can even use finishes like polyurethane or epoxy for your tabletop for a durable, shiny, and waterproof finish. Just make sure you do the work in a well-ventilated area, and wear gloves and a mask for safety.
Electric Wire Spool Table – Decorating Tips and Upcycling Ideas
Turning an industrial cable spool into a functional piece of furniture is equal parts creativity and engineering.
With your creativity, you can turn it into a cat scratching post, a giant wall clock, or a furniture piece like a rolling storage ottoman or a dining table.
With the right tweaks, this humble object can outperform store-bought tables—both in character and utility.
1. Elevate the surface like a pro
Skip the plain top and go for embedded finishes—beer bottle caps, ceramic tiles, epoxy-set mosaics, or even resin-coated fabric.
Use a clear epoxy resin layer for durability and a level finish; it not only locks everything in place but also adds water resistance and a polished, glass-like surface.
2. Reinforce the edges (because wear is real)
The edges of spool tables take the most abuse. Adding a hardwood trim (like oak or teak) or even a routed edge profile improves both durability and aesthetics.
Secure it with wood glue + brad nails, then sand and seal—it’s a small upgrade that dramatically increases lifespan.
3. Reconfigure with precision cuts
If you’re comfortable with tools, break the spool down—halves or quarters can become side tables, shelves, or wall-mounted units.
Use a jigsaw or circular saw with a fine-tooth blade for cleaner cuts, and always sand the edges post-cut to avoid splinters and uneven finishes.
4. Make it functional, not just pretty
This is where design meets practicality. Use the center cavity as open storage or close it off with plywood backing to create a cabinet-style compartment.
It’s perfect for books, gadgets, or even office essentials—turning your spool into a compact workstation or corner desk.
5. Add mobility (and flexibility)
Install heavy-duty caster wheels with locking mechanisms at the base.
This not only makes the table portable but also adds load-bearing stability—especially useful if you’re using it as a work desk or shifting it between rooms.
6. Pair it with the right seating
A spool coffee table works best with low-profile seating. Think floor cushions, poufs, or low-slung lounge chairs to maintain comfortable proportions.
If you prefer a more structured look, mid-century style chairs or compact armchairs (seat height ~16–18 inches) create a balanced and visually cohesive setup.
7. Weather-proof it like a veteran DIYer
For outdoor use, sealing isn’t optional—it’s essential. Start with thorough sanding, then apply a wood preservative followed by an exterior-grade sealant like polyurethane, spar varnish, or teak oil.
For maximum durability, use a UV-resistant marine varnish and elevate the base slightly (or add feet) to prevent moisture absorption from the ground.
The Bottom Line
In short, a wire spool table isn’t just DIY décor—it’s a canvas.
With a little technical finesse and thoughtful design, you can turn vintage wooden spools into a piece that’s as functional as it is conversation-worthy.
The good thing is you can use this table in any room for any purpose, like making a side table, or nightstand, building a chair, or creating an outdoor bar. Your family and friends will definitely love the designs and ideas.
Share the post "Finishing Cable Spool Table (With Decorating Ideas)"

Your basement is the perfect spot for building rooms you may not want in the main house. These may include Read more

Drywall is basically a panel composed of calcium sulfate dihydrate or gypsum. Other names include plasterboard, wallboard, sheetrock, gypsum board, Read more

Repainting the wooden window frames of your house is like putting on a nice, new summer dress after a long, Read more

While brushes and rollers are the traditional means of painting walls, spray paint is coming more in favor. For many Read more

Jack Luis is a semi-retired painter who loved painting his clients’ ideas on their walls.
He had worked as a painter for over a decade serving customers in areas such as Charleston, Mount Pleasant, Beaufort, and Georgetown, SC (South Carolina). Today in his free time, he likes to read and write about the newer techniques implemented in his profession. You may read more about him here or get in touch with him here.