

Varnish was meant to protect your wood furniture—but when it yellows, chips, or starts looking tired, it quickly becomes the very thing holding your piece back.
Whether you’re restoring a family heirloom or giving a thrift-store find a second life, removing old varnish is often the most important (and most intimidating) step.
The good news is you don’t need to be a master craftsman or own a workshop full of tools.
With the right method—and a little patience—you can strip varnish cleanly and safely, revealing the beautiful wood hiding underneath and setting the stage for a flawless refinish.
Let’s break down the three best ways to remove varnish from old oak cabinets, antique furniture, wooden doors, tables, chairs, or windows, and when each one works best.
Removing the Varnish from Wood
First things first!
Before you even plan to buy a good varnish remover for your wooden doors, cabinets, or furniture, you should find out if what you’re trying to remove really is a varnish or not.
You can do this check by looking at the surface closely.
Varnishes are often colored over amber. They will also have brush strokes, whereas thinner finishes will not.
After you have confirmed the finish that’s applied to the wood surface, there are three ways you can use to remove old varnish from wood furniture. You may choose and follow the steps mentioned based on the project you have on hand.
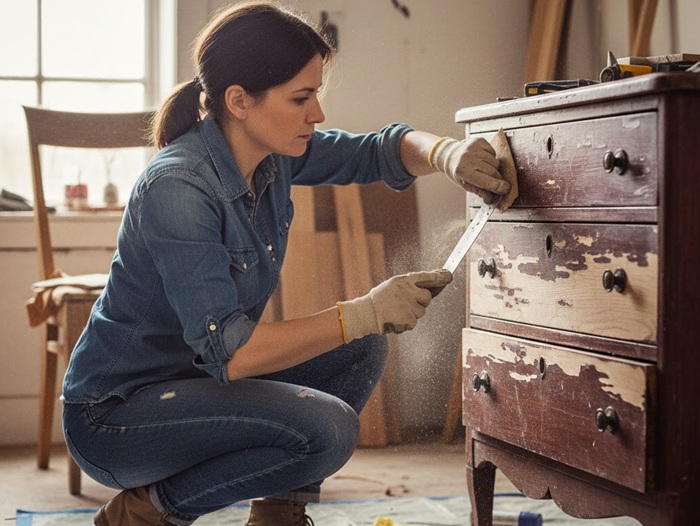
Method 1- Sanding
Sanding can be done with just about any sander you have.
It can be much more labor-intensive than some of the other options, but if you’re just painting it after it’s done, then it’s all you’ve got to do.
You can use an electric sander on flat surfaces and wide areas. But on tighter, smaller spots, a hand sandpaper and enough time in essential.
While using sandpaper, start with 150-grit sandpaper to sand down the surface. Then replace it with 220-grit sandpaper and repeat the sanding. This will completely remove the toughest of the varnish from the surface.
Overall, sanding is a good option for removing a bunch of different things, including paint, acrylic, varnish, lacquer, and shellac.
Method 2- Use Solvents
Some finishes are alcohol-based and can be taken off by using denatured alcohol or thinners.
Once it has been rubbed with a cloth damped with it, you can take a simple putty knife to scrape away at it and get it off the wooden surface. This works pretty well on shellac and lacquer.
If you find the varnish tough to remove by sanding or after using solvents, you can consider applying some heat by using a heat gun. This can soften the old varnish, making it easy to get removed.
Method 3- The Chemical Strippers
These work well at taking off acrylics, varnishes, and paints, but be careful when using them.
It contains chemicals that can be harmful to your eyes, lungs & skin, and even the environment.
Luckily, they have improved and become much safer over the years. You can even use them on furniture made of thin plies and veneers like marine plywood.
Apply it and then use fine steel wool to pull off any residue left, going with the grain of the wood.
Based on my own personal experiences, sanding for removing the wood varnish may work only when you have a very thin layer of old varnish applied on the surface.
Using a chemical stripper is more effective if you need to remove the sticky varnish layer from hard-to-remove surfaces without damaging the surface.
This is due to the fact that wood surfaces that have been well finished are often coated multiple times, and removing the varnish from these surfaces can be challenging. These may need extra efforts, patience, and much stronger agents that can help.

What Type of Varnish Removers are Best for Wood?
When you know that your project will need a good chemical stripper, choosing a varnish remover is a bit like choosing a doctor.
Pick the wrong one, and you may cause more harm than good. The right remover strips stubborn finishes while respecting the wood beneath, saving time, effort, and your furniture’s natural character.
These are some of the chemicals you should aim to remove the old varnish layer from your wood surface:
a) Biochemical strippers
These are by far the safest to use and come from a plant origin, hence the name Biochemical. They come from different citrus and other sources, such as pine or pulp, and are often seen as safer.
These are chosen because they are much more ECO-friendly and are odorless when you use them allowing them to be much more flexible.
b) Methylene chloride agents
These agents for stripping varnishes and paints are often the strongest and should be treated as such.
They often contain other components to help counteract their own strong adverse effects. And since they are incredibly effective against very heavy varnish coats that you may come across, these can be used as one of the quickest ways to remove varnish.
c) N-Methyl-2-Pyrrolidone strippers
Not quite as good as the previously mentioned Methylene chloride agents but used as a substitute for them due to health concerns.
They sometimes have more caustic chemicals in them, but much less of them, making them a lot safer to use. These are far safer, but at the same time strip the wood just a little worse.
Can vinegar remove varnish from wood?
Vinegar can sometimes soften very old, natural varnishes or thin layers, but it’s generally ineffective and potentially damaging to modern, robust varnishes like polyurethane
For those modern varnishes, commercial strippers or sanding are better, while vinegar is better suited for cleaning or creating wood stains, not removing tough finishes.
Always spot test first, and be aware that vinegar’s acidity can harm unsealed or waxed wood, so use commercial products or sanding for better results on most varnish.
Precautions and Tips When Using Wood Varnish Removers
Varnishes and wood finishes can be toxic, especially the dust and fumes you will need to deal with when stripping.
You will therefore need to be cautious by following these tips:
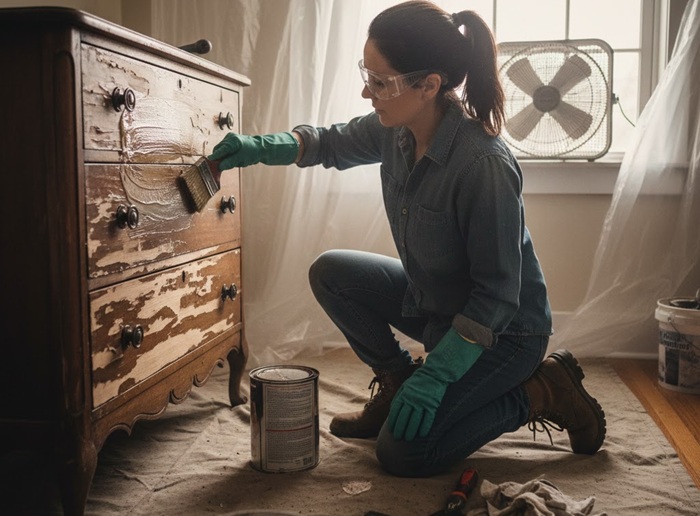
1- Chemical strippers release strong fumes that can cause dizziness or headaches. So, it’s essential to create cross-ventilation (by using fans and opening the windows) when working inside, or take your project outside if possible.
2- When using solvents, chemical liquids, or gels, do not forget to wear long clothing, safety goggles, rubber gloves, and a respirator mask.
3- Protect the nearby area/surfaces by using a heavy-duty canvas drop cloth or thick plastic. Varnish remover will eat right through thin trash bags or newspapers, potentially damaging the floor underneath.
4- If removing varnish from the wooden floors, remove all the furniture from the room. If possible, also take off the hardware (like screws, knobs, hinges, etc) from the cabinet, doors, windows, or other furniture items you are removing varnish from.
5- For flat surfaces, a metal putty knife with rounded corners is best to avoid gouging the wood. For delicate carvings, use a stiff brass brush or even “0000” steel wool dipped in the remover.
6- After the varnish is gone, the wood still has chemicals on it. Wipe the piece down with mineral spirits or a specific “after-wash” recommended by the product manufacturer. This ensures your new stain or paint will actually stick.
Tips for Choosing the Varnish Remover Product for Your Wood
Now that you are aware of the different varnish remover agents and processes, let’s go over the choices you will have to make before you can make your full purchase.
These factors, when considered, will help you make your choice for the job you are planning to do.
1- Chemicals and fumes
A long time ago, most paint varnishes contained Methylene chloride, which can give off very dangerous vapors and odors that can quickly fill your house for days.
Nowadays, most producers are removing such harsh chemicals from the varnish removers and making them safer.
This allows you to use them indoors or anywhere else without worry, and some are even skin-safe now. Allowing you to use it without having to worry about what may happen.
Although it’s always best to be at least a little careful when dealing with any of these chemicals, as getting anything like this absorbed through your hands and inhaled in large quantities can possibly be harmful to you.
So even if a chemical says it’s safe for human skin contact, it might still be best to wear gloves, eye protection, and respiratory protection.
2- How effective is it?
What’s more important, by far though, is how well it works.
If it is incredibly safe and does not work at the end of the day what’s the point?
Some are called fast-acting and can finish in as little as 2-5 minutes. This may be what you want if you have a thinner finish or just a smaller job to get done quickly in a short span of time, as this will only get you results layer by layer rather than eating through a larger number of layers all at once.
Others do not as much; they can stay active for hours and eat away layer after layer of the varnish. This is best if you have multiple layers you need to get through, as it will just not stop until it is done.
Even if it doesn’t eat all the layers the first time, you can always reapply it as well to get the intended result.
3- Where can it be used?
Most varnish removers are multi-surface and can work on just about anything, metal or wood. However, they will melt and eat through plastics if left on, though, and should be watched carefully.
Better than watching, though, would be to find a varnish remover that names the specific type of surface you are trying to remove varnish from, especially if the surface is glass, fiberglass, or some other surface you want to protect.
Also, be sure that you get a finish that can be used on vertical surfaces if you intend to use it on any such surface, as thinner products may not stay in the place you want them to.
4- How much time should you leave it on?
Different products require different things.
Some products say to leave them on for up to twenty-four hours, but they will gum up and harden if left on that long. If it does gum up like this, it just makes your job harder to accomplish.
You should watch carefully if you apply a varnish remover that makes this claim, as you don’t want to make the job any harder than it already is.
On the other hand, the thinner ones have a tendency to evaporate very quickly and won’t do much if it just gone.
If that happens, you should again be paying attention and be ready to apply the remover until the intended effect is accomplished.
Always be ready to reapply any finish remover you may be using if you don’t think it’s doing the job as well as you had hoped. Just remove it the way you would normally and apply more.
5- How much cleanup and preparation does it need?
Before you start your project, be mindful of the safety and things you plan to do with the varnish remover.
You should always wear gloves and other protective equipment, like a face mask, when dealing with these chemicals. Even if it claims to be skin safe or not to have any harsh chemicals in it, we have to remember what the job is: to remove paint varnishes.
Chemicals, liquids, and stripping gels that aren’t harmful to humans can still be very dangerous when absorbed through the skin and into the bloodstream.
Even when working with odorless chemicals, goggles and a mask may be a good idea, just to err on the side of caution. Just because the chemicals have no odor doesn’t mean they aren’t there anymore.
Also, always keep a rag nearby as well to wipe off the remover from anything you did not intend to get it on if that ever may occur. Make sure the rag is moist and that there is some soap nearby to accompany it.
6- How easy is it at wiping off the overall finish?
After you let the product do its job and eat away at whatever it is you’re trying to get rid of, it’s time to remove it.
Assuming the product you chose did its job correctly, the first layers of the varnish should come off relatively easily, but be ready to remove the later layers with steel wool or a brush.
Remember to be very gentle when wiping away, as we don’t want to mess up the surface underneath.
Gentle strokes with minimum pressure will get the job done. And if those strokes don’t get the job done, you can always reapply the finish remover or try a new one to achieve that intended result.
If the first coat removes many layers but stops short, a second or third application may get you the results you wanted.
The conclusion
In the end, if you ask me, which of the above methods can remove varnish better from wood surfaces? Is it scraping, sanding, or chemical stripping?
I would say it would largely depend on the type of surface and varnish you are working with. If you want to get the best results, try the combination.
Scraping is recommended for wood varieties like walnut, maple, mahogany, birch, and even plywood, as it’s easier and safer.
So, what you can do is scrape the varnish first using some chemical strippers and then sand off the excess of it slowly that wasn’t removed. This will ensure that you get finer results by stripping off old varnish from your old wood furniture without getting any damage.
Share the post "3 Best Ways to Remove Varnish from Wood Furniture"

One of the greatest feelings in the world is finishing a project. Whether it be remodeling part of your house Read more

Old & Empty Paint Cans We see continuous development around the globe all the time. Due to this, you can Read more

Repainting your cabinets is a great way to give your kitchen a fresh, newer look. However, there is a deceptive Read more

Painting your home can be a great relaxation and fun for DIYers. Yes, it's wonderful - until you spill some Read more

Jack Luis is a semi-retired painter who loved painting his clients’ ideas on their walls.
He had worked as a painter for over a decade serving customers in areas such as Charleston, Mount Pleasant, Beaufort, and Georgetown, SC (South Carolina). Today in his free time, he likes to read and write about the newer techniques implemented in his profession. You may read more about him here or get in touch with him here.